If you run a WooCommerce store and you are short on time, StoreAgent uses AI to write product content, answer shopper questions, and flag gaps in your catalog. This guide shows you how to install the plugin, connect your store, and turn on the AI Tasks that fit your goals. By the end, you’ll have a working AI Chat Bot on your storefront and AI Tasks ready to run on your product catalog.
Requirements
Before you install StoreAgent, make sure your site meets the following:
- An active WordPress site running WordPress 5.9 or later.
- WooCommerce installed and active.
- PHP 7.4 or later.
- HTTPS enabled on your site. StoreAgent needs a secure connection to talk to the AI service.
- A free or paid StoreAgent account (covered in the next section).
No coding required. The full setup is three things: install the plugin, connect your account, and turn on the AI Tasks you want. You won’t touch any code, edit any templates, or write any prompts.
Sign up for StoreAgent
You’ll need a StoreAgent account before the plugin can do anything. Head to app.storeagent.ai/sign-up to create one. No credit card is required.
New to AI in your store? Try our StoreAgent Lite plan including up to 1,000 memory items, 50 AI chat replies (one-time) and 200 AI tasks (one-time). It’s enough to try out the AI Chat Bot and a handful of AI Tasks on your real catalog before you decide whether to upgrade.
Looking for the StoreAgent affiliate program instead? That lives separately at storeagent.ai/affiliate-program. Sign up there if you’re promoting StoreAgent to your audience, not running a store yourself.
Install and connect the plugin
Once you have an account, install the plugin on your WordPress site and connect it.
Step 1: Install the plugin
- Log in to your WordPress admin dashboard.
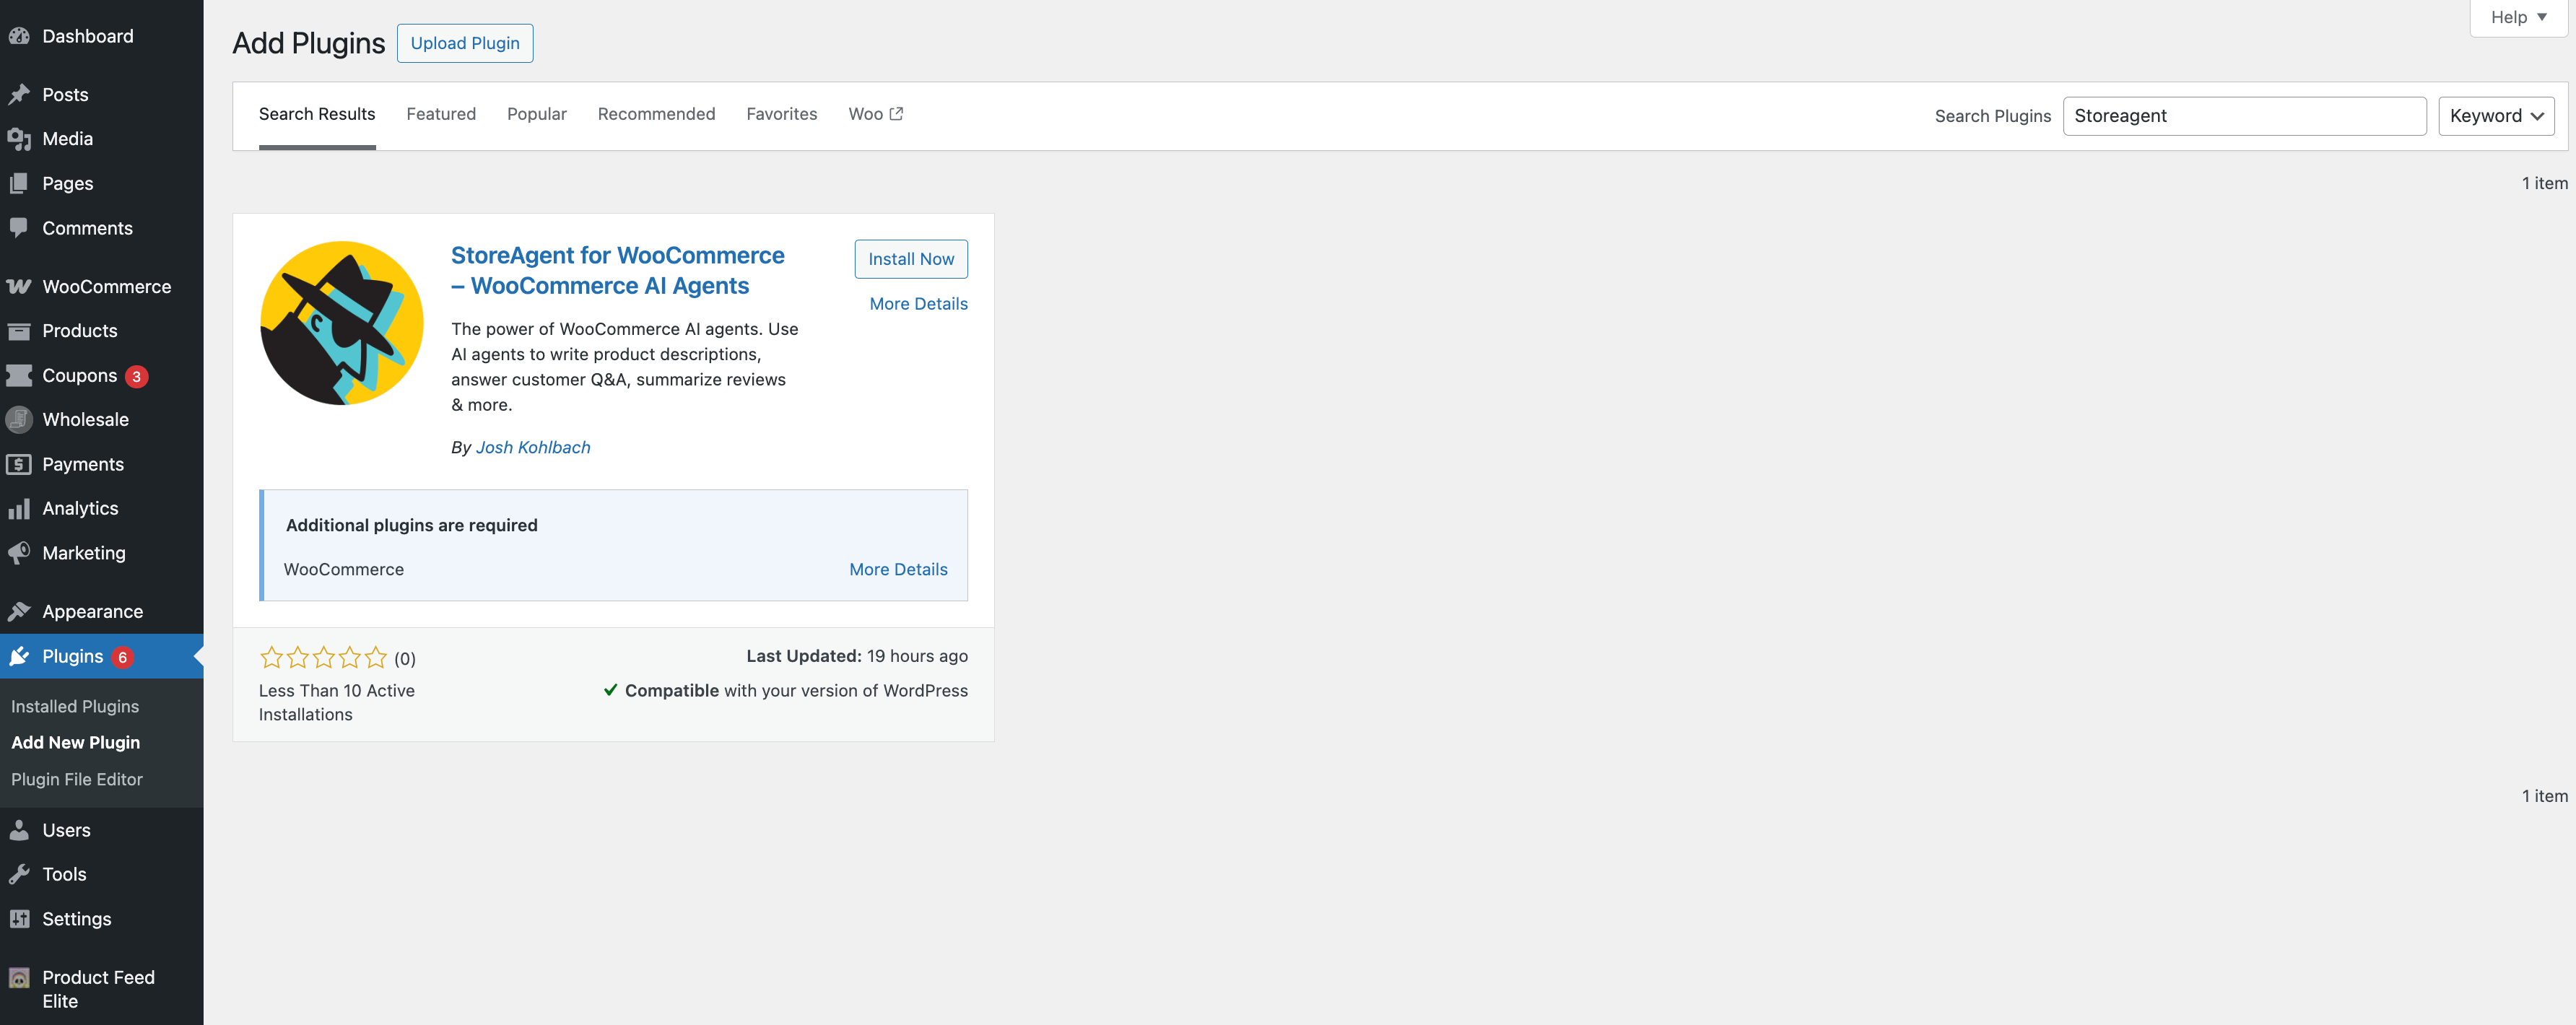
- Go to Plugins → Add Plugin.
- In the search bar, type StoreAgent.
- Click Install Now, then click Activate once the install finishes.
Step 2: Connect your store to your StoreAgent account
The plugin needs to talk to your StoreAgent account to use AI. Connect it now:
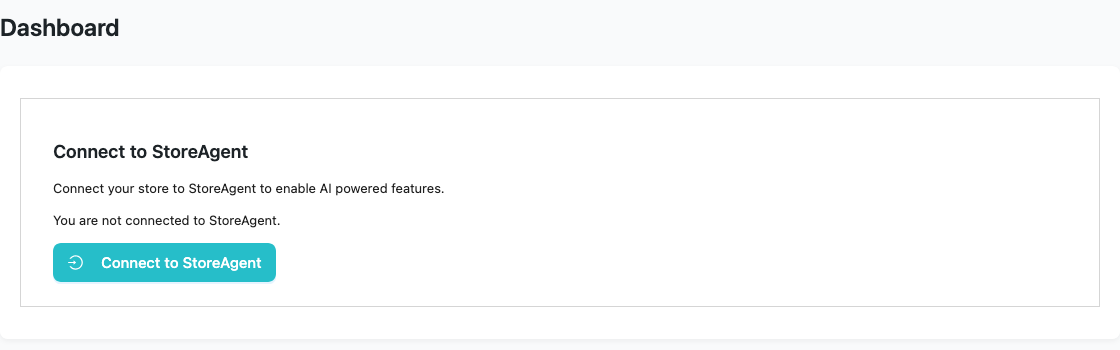
- In your WordPress dashboard, click StoreAgent in the admin menu. You can also click Connect under StoreAgent on the Plugins screen.
- Click Connect to StoreAgent.
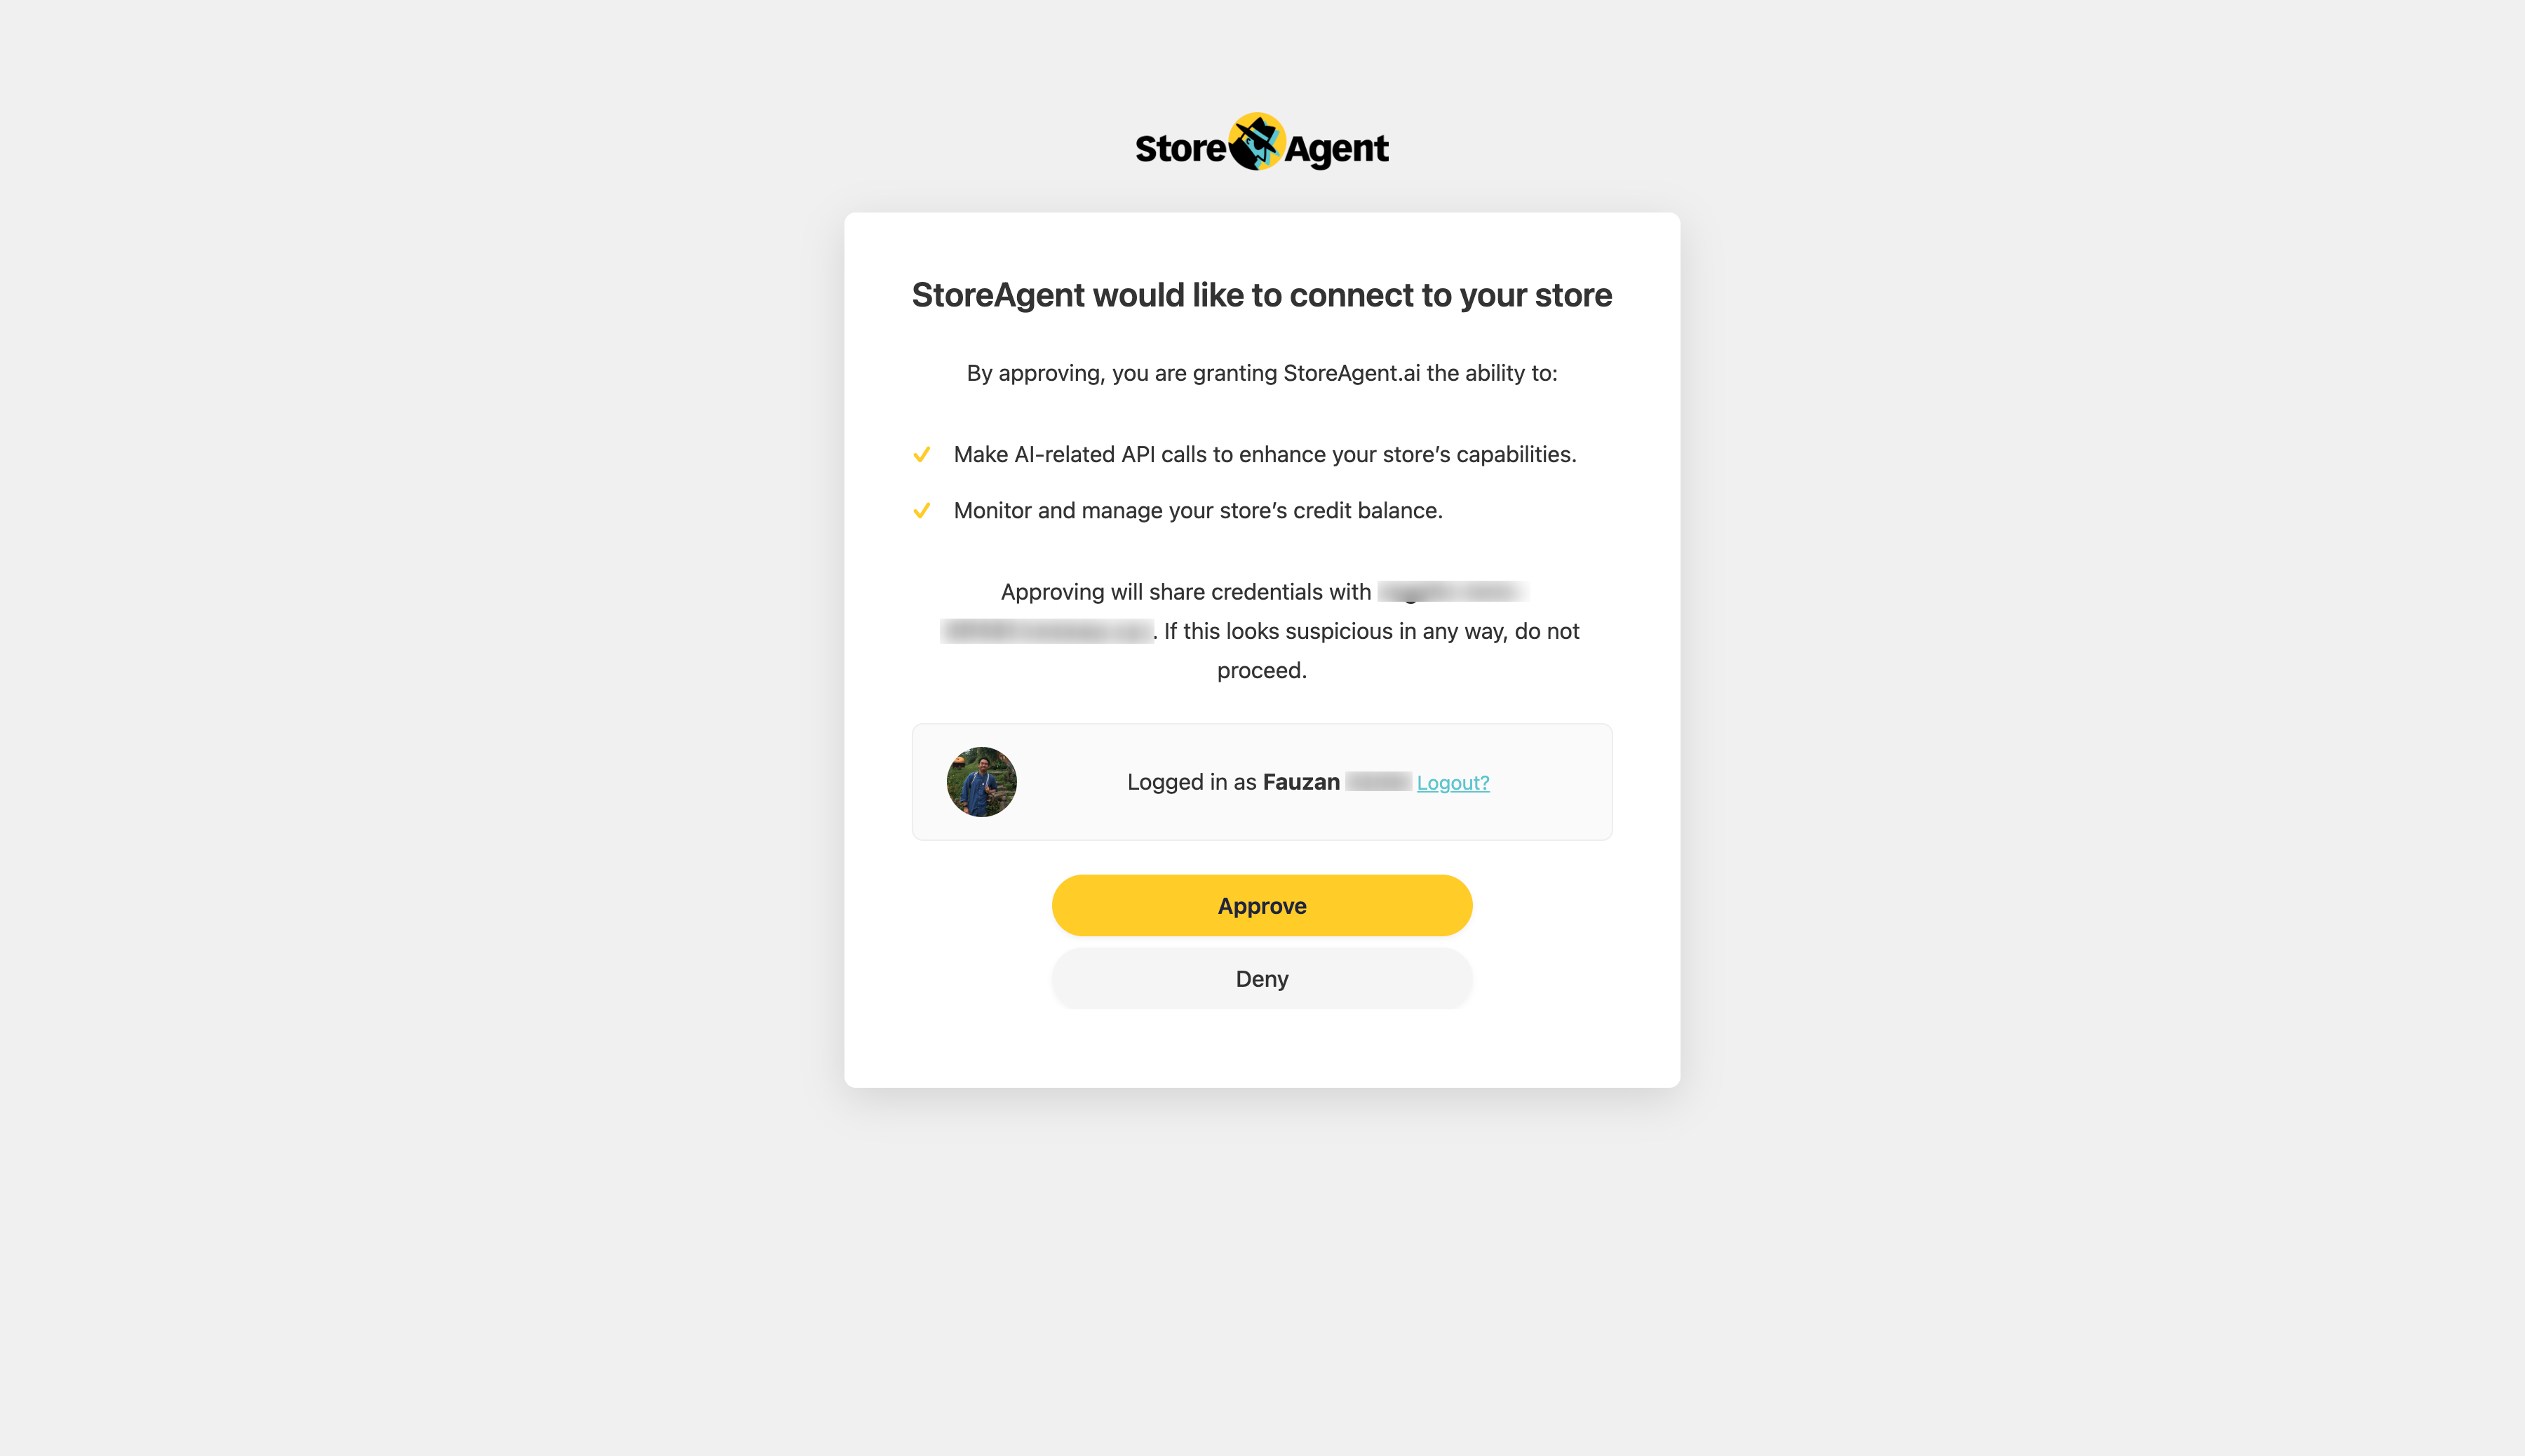
- Follow the prompts to sign in to your StoreAgent account and authorise the connection.
Once connected, an onboarding wizard launches. In five short steps it helps you choose your AI Tasks, set up the AI Chat Bot, and optionally connect an AI assistant through MCP. You can complete it now or skip it and configure StoreAgent manually later. See How to set up the StoreAgent onboarding wizard for a walkthrough of every step.
What StoreAgent’s AI can do for your store
StoreAgent groups its AI features into three areas. You can turn on as many or as few as you like. Every store uses a different mix.
Customer-facing AI
These features show up on your storefront and admin dashboard to help shoppers and surface opportunities to you.
- AI Chat Bot: a 24/7 chat widget on your storefront that answers customer questions and recommends products in natural conversation.
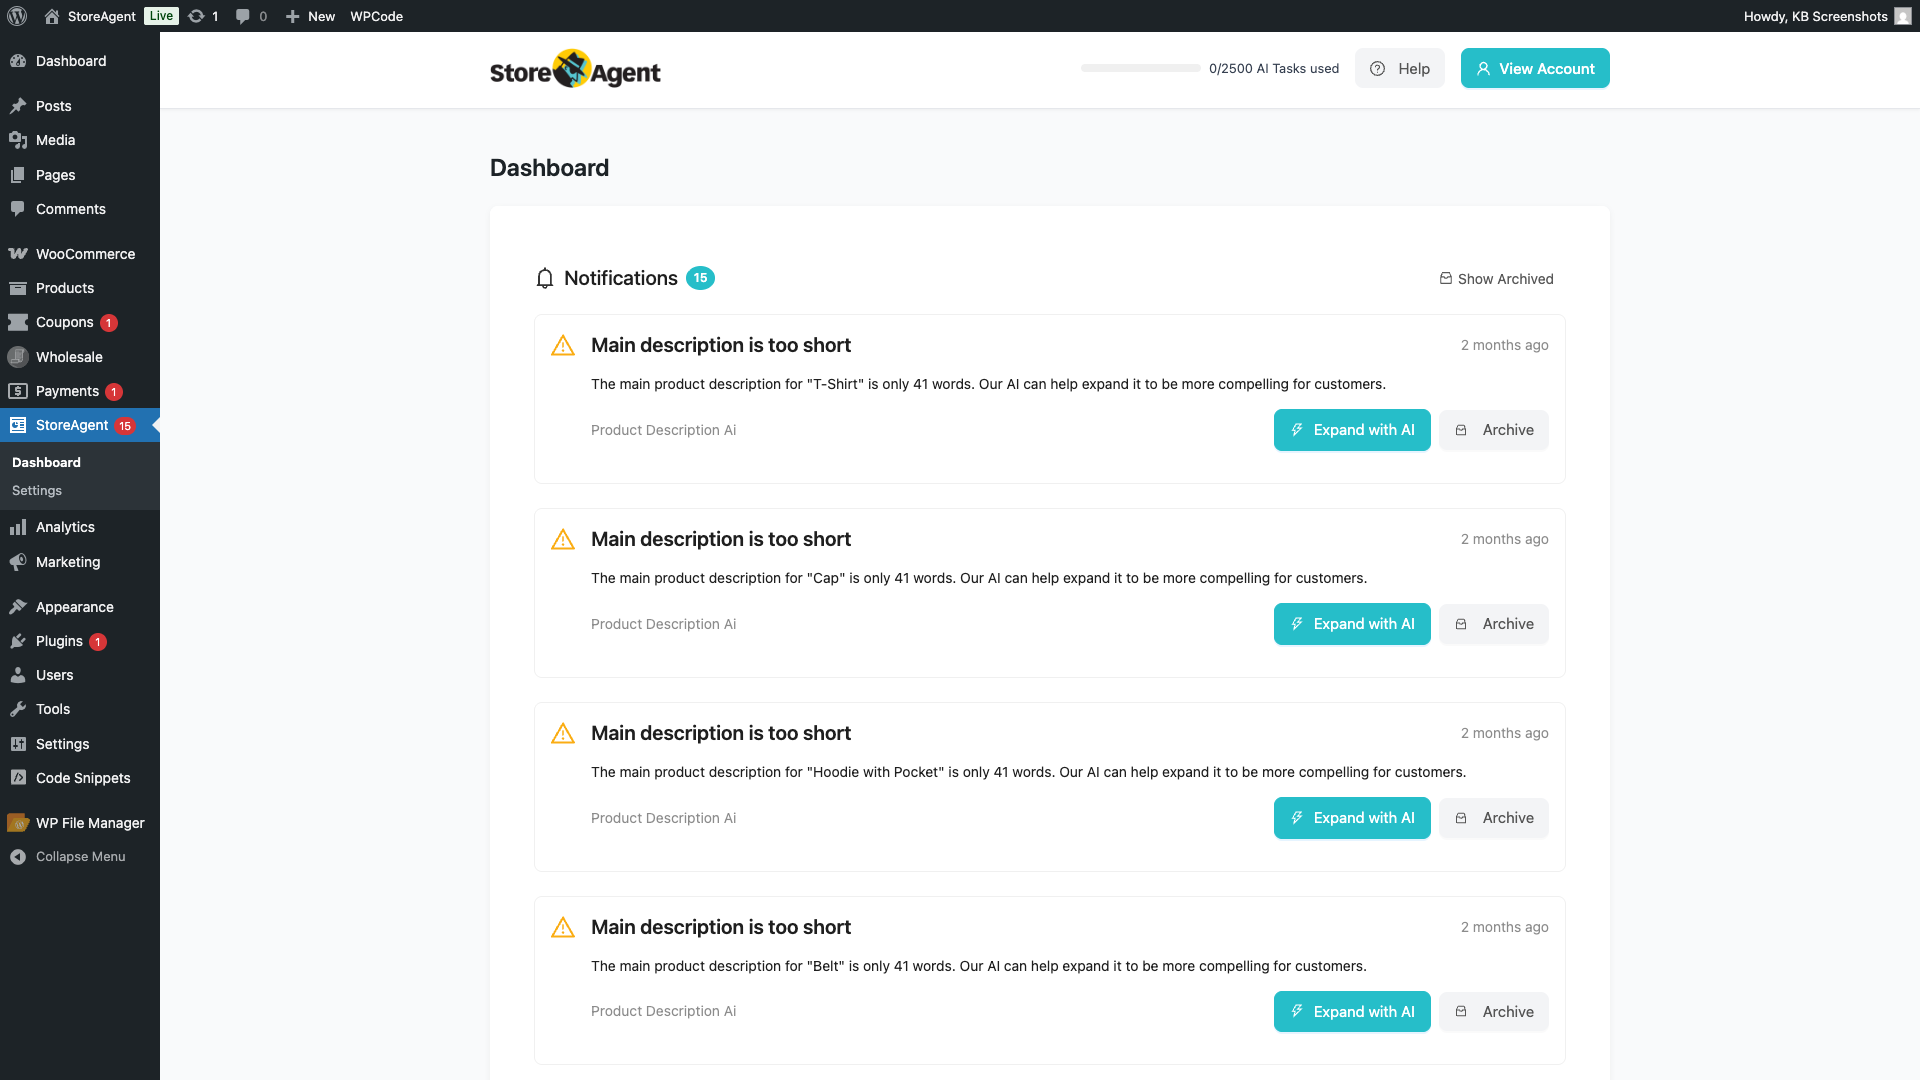
- AI Insights: dashboard notifications that flag opportunities on your product listings (for example, “Main description is too short”, followed by the product name). Each notification has a one-click action to fix the issue with AI. See How the StoreAgent dashboard works for the full guide.
You can customise the AI Chat Bot’s name, greeting, position, colours, and tone to match your brand. See Getting started with the AI Chat Bot for the full walkthrough.
Product page content
AI Tasks that generate or improve the copy on your product pages. For the full guide to enabling, running, and refining each one, see Getting started with StoreAgent AI Tasks.
- Product Description AI: generates full, on-brand product descriptions.
- Product Summaries AI: writes short product summaries for cards and listing pages.
- Product Tags Generator AI: suggests relevant tags to improve discovery.
- Category Description AI: writes category page descriptions to improve SEO and shopper context.
- Image Alt Tags AI: auto-generates accessible, SEO-friendly alt text for your product images.
Cross-sell, reviews and coupons
AI Tasks that work behind the scenes on revenue-driving content.
- Product Upsells AI: scans your catalog every 24 hours by default, finds products with no upsell or cross-sell pairings, and suggests matches for one-click approval.
- Review Moderation AI: flags reviews that look like spam, fake content, or inappropriate material.
- Review Summaries AI: reads the approved reviews on a product and writes a short summary that shoppers see in the Reviews tab, with key takeaways marked positive, neutral, or negative.
- Coupon Description AI: writes concise marketing copy for your existing WooCommerce coupons based on their configuration.
- Coupon Generator AI: for stores using Advanced Coupons, generates fully-configured coupons from a plain-English prompt.
- WC Vendors Product Moderator AI: for multi-vendor stores using WC Vendors, reviews vendor-submitted products against your store policies before they go live. With image review turned on, it also checks the product image and gallery images, and each image check uses 1 AI Task.
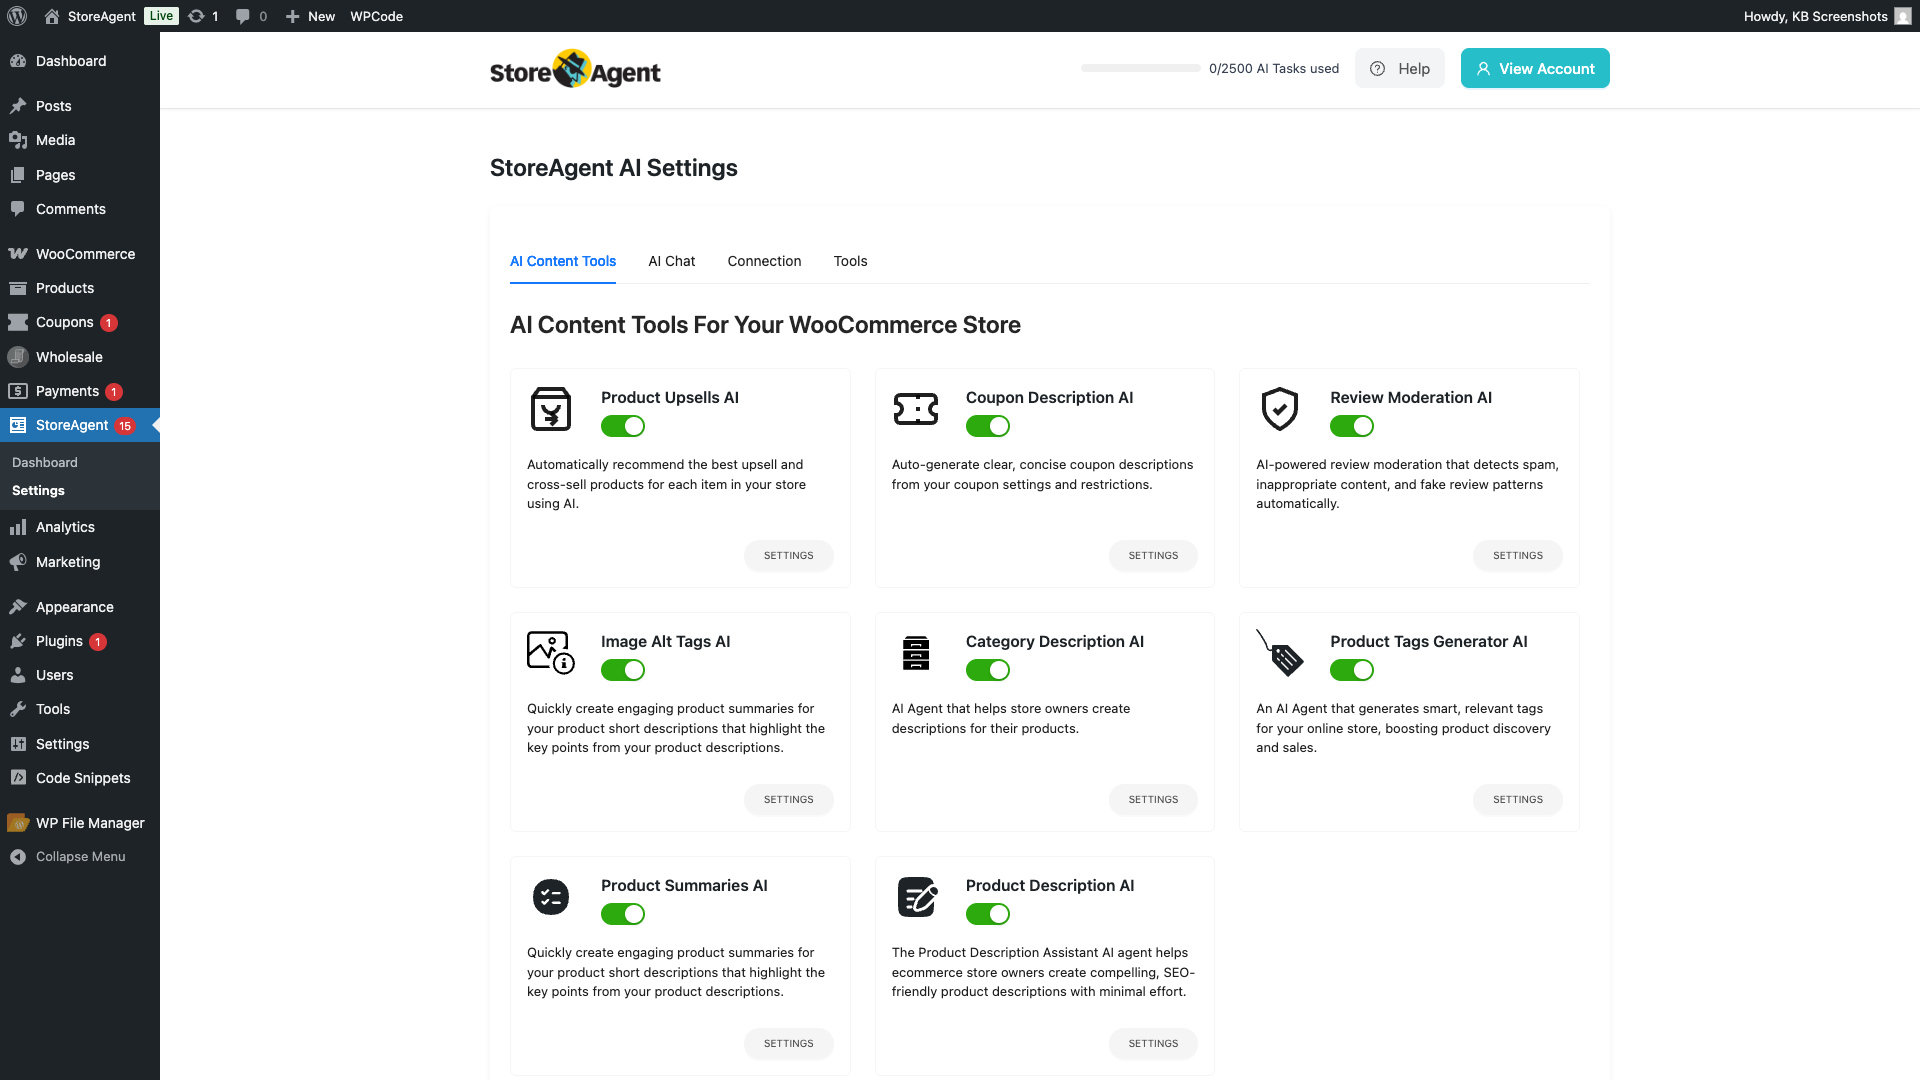
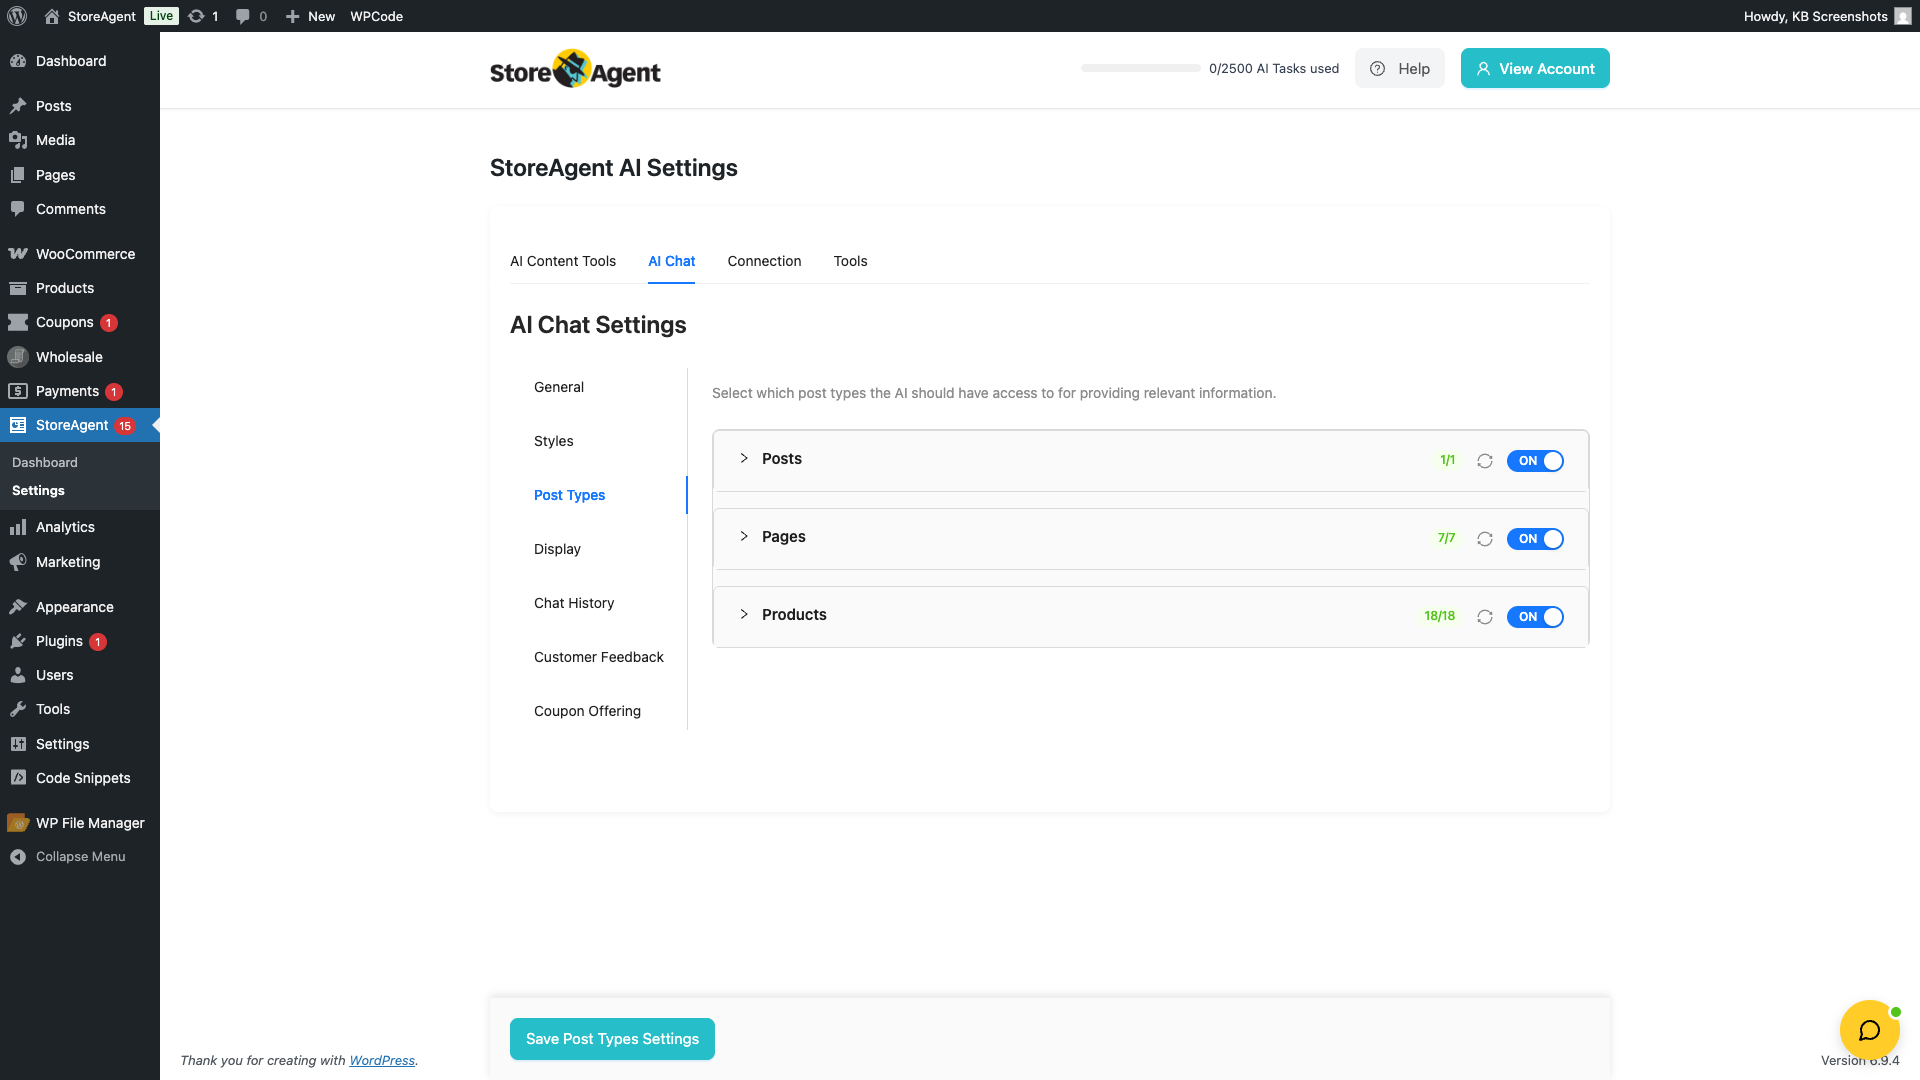
After onboarding, StoreAgent → Settings has five tabs: AI Content Tools, AI Chat, MCP, Connection, and Tools. To turn AI Tasks on, go to StoreAgent → Settings → AI Content Tools and flip the toggle next to each one you want. To set up the chat bot, head to StoreAgent → Settings → AI Chat and walk through the General, Styles, Post Types, Display, Chat History, Customer Feedback, and Coupon Offering sub-tabs.
Account, billing and data privacy
Your StoreAgent account and your store data are separate things, and you can manage each one independently.
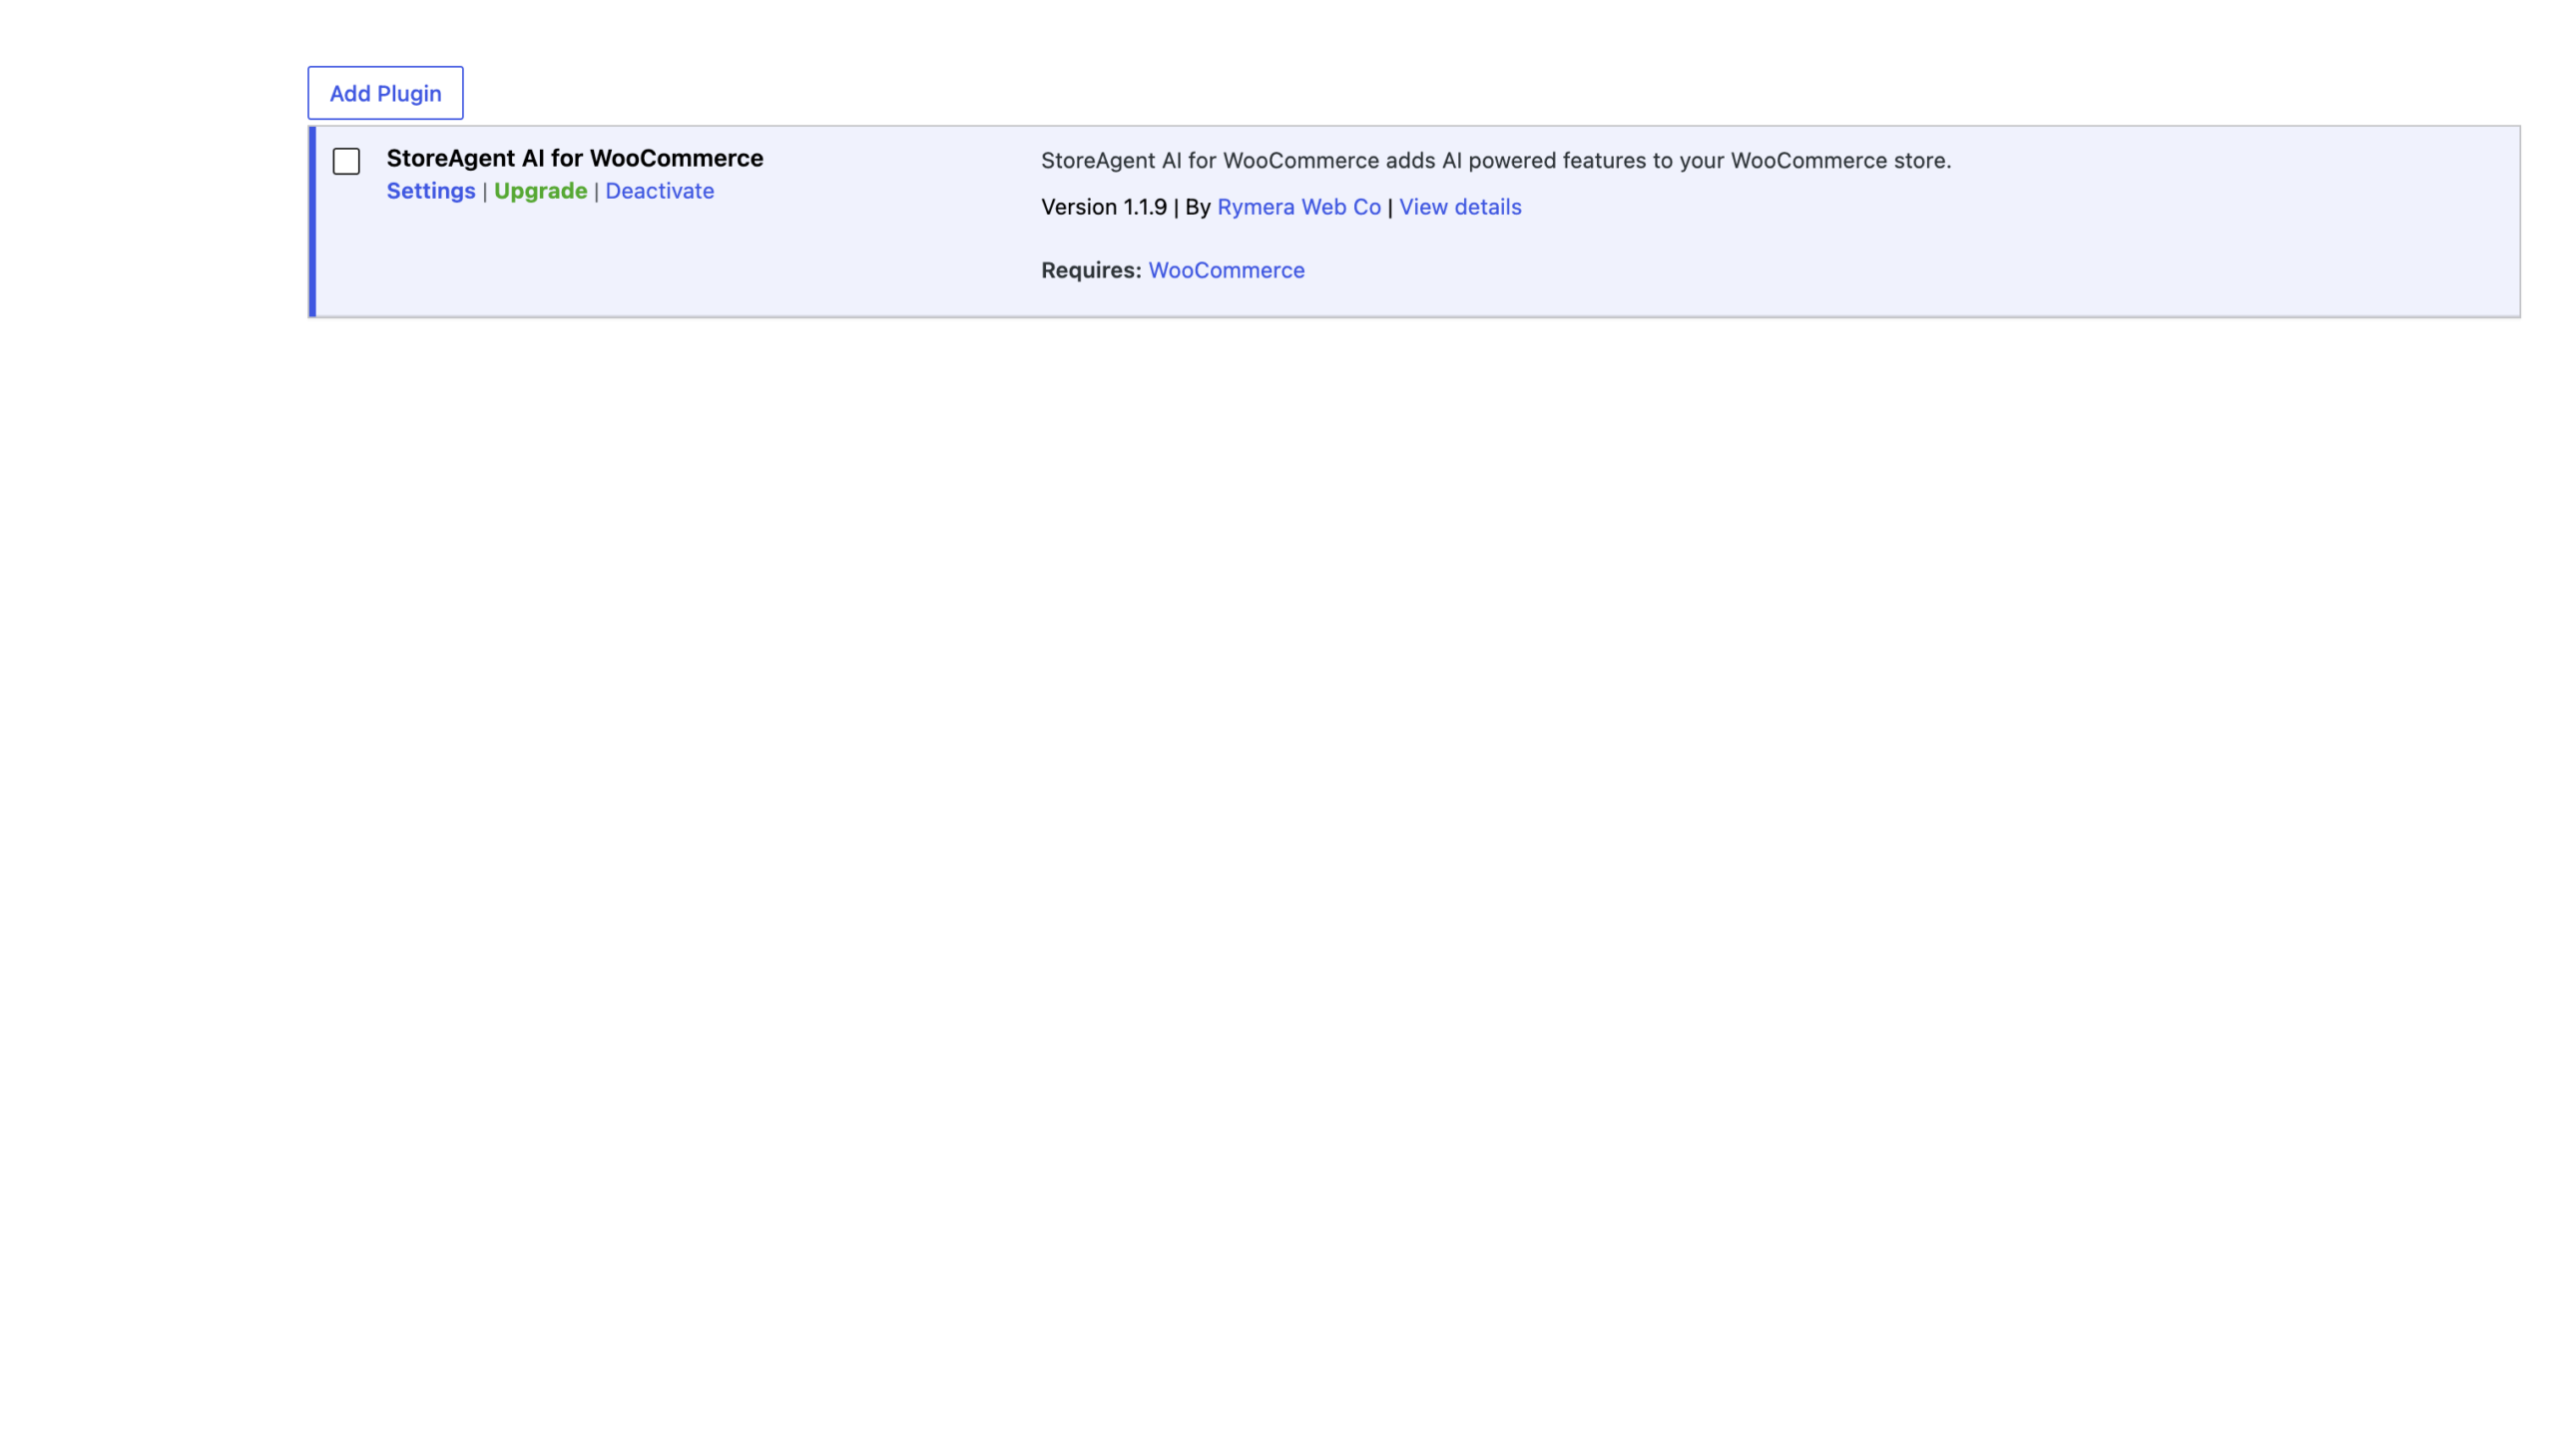
- Plans and billing. Sign in at app.storeagent.ai to view your plan, upgrade, downgrade, or update payment details. The free StoreAgent Lite plan has no expiry, though the included AI chat replies and AI tasks are one-time allowances rather than refreshing monthly. If your store is on the free StoreAgent Lite plan, an Upgrade link also shows next to Settings under StoreAgent on your Plugins screen. It opens the StoreAgent plans page in a new tab.
- Cancelling your subscription. Paid plans can be cancelled from your StoreAgent account dashboard. You keep access to paid features until the end of the current billing period.
- Disconnecting your store. In WordPress, go to StoreAgent → Settings → Connection and click Disconnect from StoreAgent. This stops the plugin from sending data to StoreAgent without deleting anything you’ve generated.
- Deleting your data (GDPR). Full account and data deletion isn’t self-service. To request deletion of your StoreAgent account and all associated data, submit a support ticket with your account email. Our team handles the deletion. You can read more in our Privacy Policy.
Frequently asked questions
Do I need a website to use StoreAgent?
Yes. StoreAgent is a WordPress plugin for WooCommerce stores. You need an existing WordPress site with WooCommerce installed before the plugin can be installed and connected. If you don’t have a site yet, set up WordPress and WooCommerce first, then come back to install StoreAgent.
Can I use StoreAgent on Shopify, Wix, Squarespace, or BigCommerce?
No. StoreAgent is a WordPress plugin built specifically for WooCommerce stores. It won’t run on Shopify, Wix, Squarespace, BigCommerce, or any non-WordPress platform. If you’re moving from one of those to WooCommerce and want to add AI to your new store, this guide walks through the setup once WooCommerce is installed.
Do I need any technical skills?
No. If you can install a WordPress plugin and click through a few settings tabs, you have everything you need. There’s no code to write, no API keys to copy, no templates to edit. The connection happens through a guided wizard, and every AI Task is a single toggle.
Where do I sign up for a StoreAgent account?
At app.storeagent.ai/sign-up. The StoreAgent Lite plan is free and includes 1,000 memory items, 50 AI chat replies (one-time), and 200 AI tasks (one-time). No credit card is needed to start.
How do I cancel my StoreAgent account?
Sign in at app.storeagent.ai and cancel from your account dashboard. For full data deletion under GDPR, submit a support ticket. See the Account, billing and data privacy section above.
Is my store data private?
StoreAgent only accesses the data you grant it via the WordPress plugin: your product catalog, store metadata, and (if you enable them) customer chat conversations. See our Privacy Policy for the full breakdown of what’s collected and how it’s used.
What’s next
With StoreAgent installed and connected, the next step is turning on the features that match your goals:
- How to set up the StoreAgent onboarding wizard: walk through the guided setup that runs after you connect your store.
- Getting started with the AI Chat Bot: customise the storefront chat widget and choose what it can answer.
- Getting started with StoreAgent AI Tasks: turn on, configure, and run every AI Task across your store.
- How to bulk run StoreAgent AI Tasks in WooCommerce: run an AI Task across your whole catalog in one go.
- How StoreAgent AI Memory works: understand how the bot indexes your products and keeps responses accurate.
- How the StoreAgent dashboard works: read the notifications stream and act on AI Insights suggestions.
- How to connect ChatGPT or Claude to your store with MCP: let AI assistants work with your store.

Get the full power of StoreAgent
Outgrowing the 50 chat replies and 200 AI tasks on Lite? Paid plans unlock recurring monthly allowances of AI Chat replies and AI Tasks, plus a much larger AI Memory, so your store keeps up with your customers without you doing the work. See current plan limits on the pricing page.
Need an earlier version of the plugin?
You can install an earlier release of the free StoreAgent plugin from WordPress.org. Open the StoreAgent plugin page, click Advanced View at the bottom, and choose the version you want under Previous Versions. The free WP Rollback plugin can also roll it back from your Plugins screen.
Once you have the file, back up your site, then install it from Plugins → Add Plugin → Upload Plugin. Upload the ZIP and choose Replace current with uploaded. To stop the plugin updating back to the newest release, click Disable auto-updates next to it on your Plugins screen. Your StoreAgent plan and AI features are managed in your account dashboard, so they are not affected by the plugin version.
Need help?
If you have a question or run into any issues, we’re here to help.
- Premium users: Open a support ticket
- Free users: Visit our community forum