
StoreAgent‘s dashboard is the home screen for every AI feature you’ve turned on, the place where StoreAgent surfaces what it’s noticed about your store, what it’s done already, and what it wants your approval on. This article walks through what’s on the dashboard, what each notification type means, and how to act on decisions waiting for your review.
Opening the dashboard
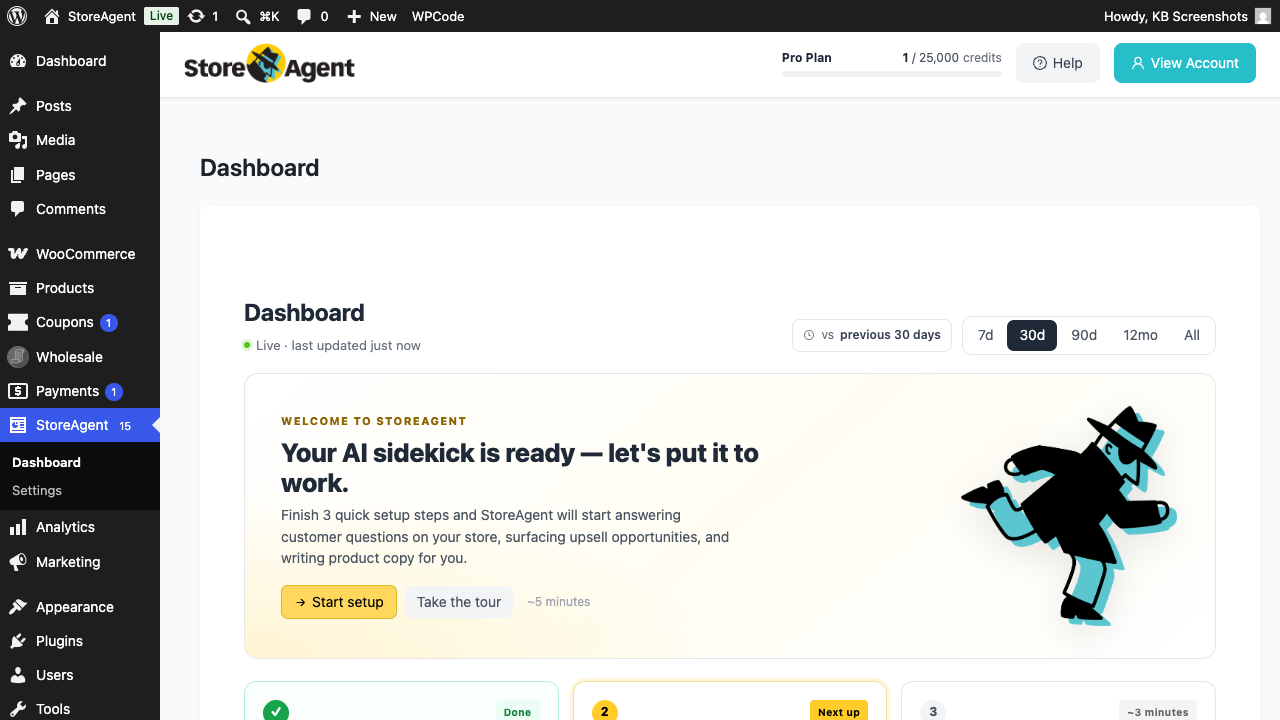
In your WordPress admin, go to StoreAgent → Dashboard. The page header shows the title Dashboard, a live indicator (Live · last updated just now), and a time-range filter you can switch between 7d, 30d, 90d, 12mo, and All. The selected range controls what metrics appear (more on those below) and what “vs previous period” comparison is shown.
What new stores see: the setup hero
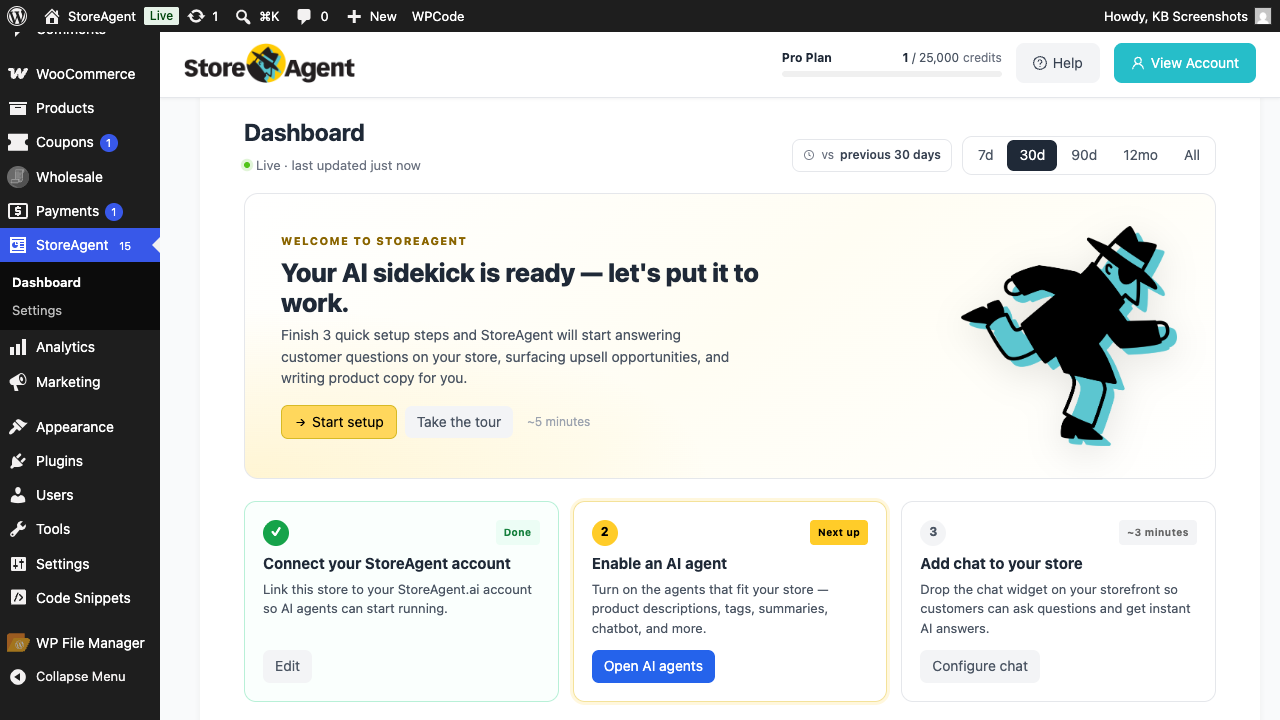
If your store hasn’t recorded any chat activity or chat-attributed revenue yet, the dashboard opens on the Welcome to StoreAgent hero. It’s a guided three-step setup checklist that gets you from a fresh install to a working AI Chat Bot.
- Connect your StoreAgent account: links this WordPress site to your StoreAgent.ai account so the AI Tasks can run. About 30 seconds. Once connected, the step shows a Done badge and an Edit button to manage the connection.
- Enable an AI agent: turn on the AI Tasks that fit your store (product descriptions, tags, summaries, the chat bot, and more). Opens the AI Agents settings. About 2 minutes.
- Add chat to your store: configure the AI Chat Bot so shoppers can ask questions on your storefront. About 3 minutes.
Each step has its own action button. The Start setup button at the top of the hero opens the onboarding wizard if you’d rather run all three at once. Take the tour walks you through the same flow with extra context.
What you’ll see once chats start rolling in
The setup hero is a placeholder. Once your store records at least one chat session or chat-attributed sale within the selected time range, the dashboard automatically switches from the welcome view to a metrics view. You’ll see KPI cards for chats, conversions, revenue, and impressions across your selected period. Each card shows the current value, the change vs the previous period, and a sparkline of activity.
A “What you’ll see once chats start rolling in” preview row sits between the setup hero and the notifications panel, empty placeholder cards that turn into real metrics once activity starts.
Understanding your dashboard metrics
Once your store records activity, the top of the dashboard shows a short AI-written summary of your results, followed by a row of KPI cards. Here is what each metric means.
| Metric | What it measures |
|---|---|
| Revenue | Sales from orders a shopper placed after talking to your AI Chat Bot. It shows a dash rather than a figure until chat-attributed revenue is available. |
| Conversion rate | The share of chat sessions that led to a purchase, worked out as assisted purchases divided by chat sessions. It shows a dash instead of a number when there are too few chat sessions to give a reliable figure. |
| Chats | The number of separate chat sessions in the selected period. |
| Impressions | The number of times the chat widget was shown to visitors in the selected period. |
Conversions count only orders that are linked to an AI Chat Bot conversation, not every paid order in your store. If you once saw a conversion rate that looked far too high, for example several hundred percent, that was a reporting error that has since been fixed. The dashboard now credits a purchase to chat only when the order came from a chat conversation, and it shows a dash instead of a figure when there are not yet enough chats to calculate the rate reliably.
The Pending decisions & updates panel
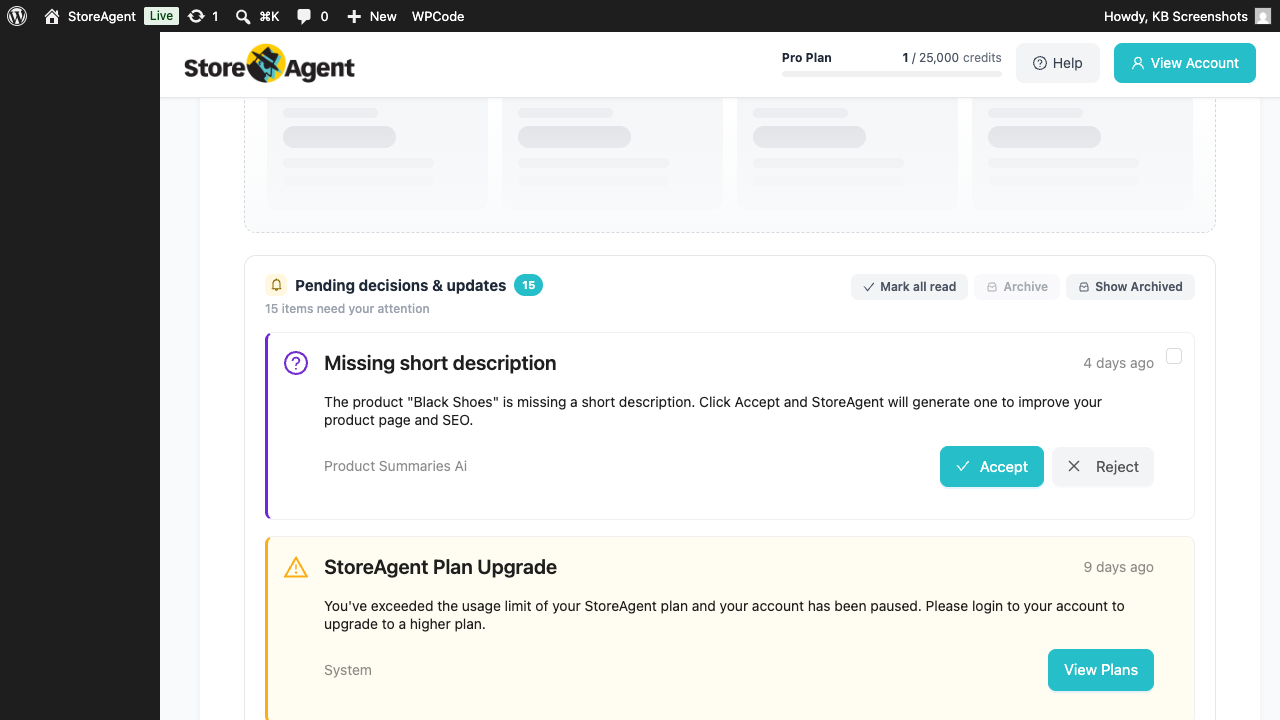
Below the setup hero (or KPI band, once active) is the Pending decisions & updates panel. This is the panel you’ll spend most of your time in. AI Tasks file notifications here when they’ve spotted something worth your attention or have a suggestion waiting for your approval.
The panel header shows the count of active items, a one-line summary (“15 items need your attention“), and three actions in the top right:
- Mark all read: clears the unread state on every active notification without archiving them. Useful when you’ve scanned the list but want the items to stay actionable.
- Archive: bulk-archives every active notification at once. Confirm carefully, this moves all items out of the active view.
- Show Archived: switches the panel to the archived view. The button label flips to Show Active while you’re in the archived view; click it to return.
Notifications are paginated at 10 per page. The pagination control sits below the last card.
Notification types
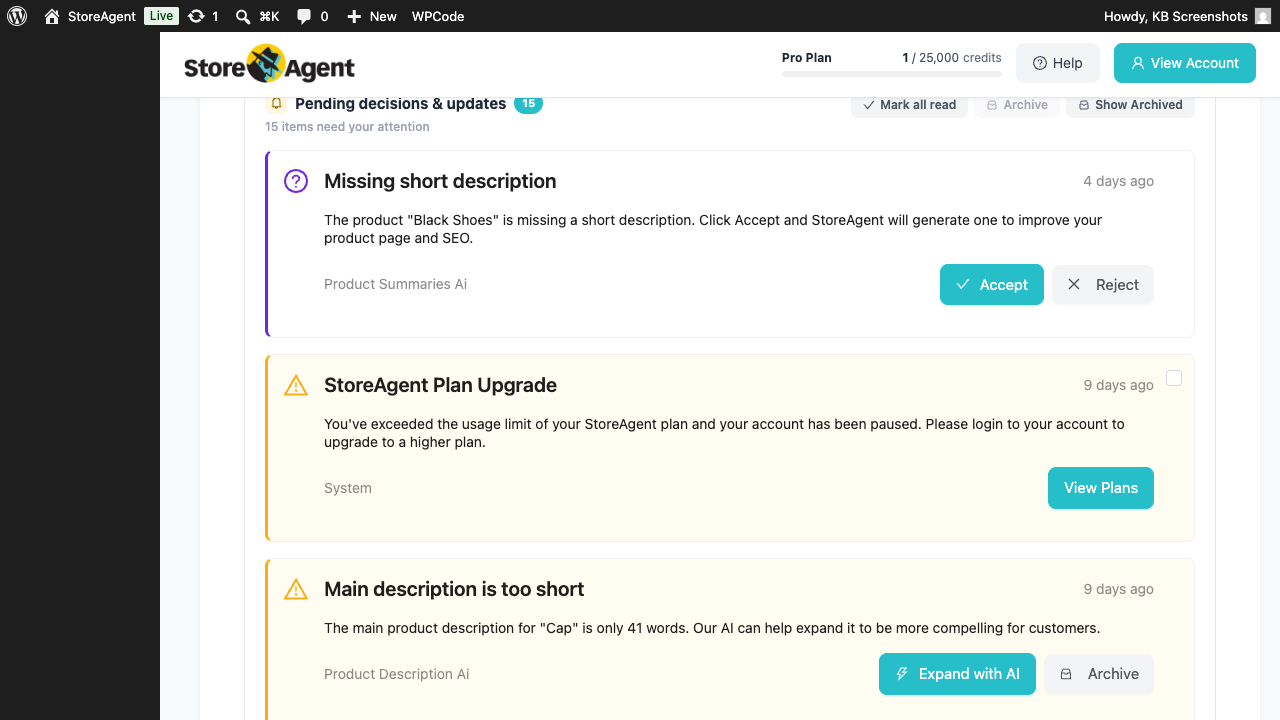
Each notification card has a colour-coded icon that signals what kind of attention it needs.
| Icon | Type | What it means | Typical action |
|---|---|---|---|
| Purple ? | Decision | An AI Task has a specific recommendation waiting for your approval | Accept applies the change; Reject dismisses it |
| Blue ● | Suggestion / Info | The AI noticed something it can improve, or has a general update for you | Expand with AI, Archive, or a similar inline action |
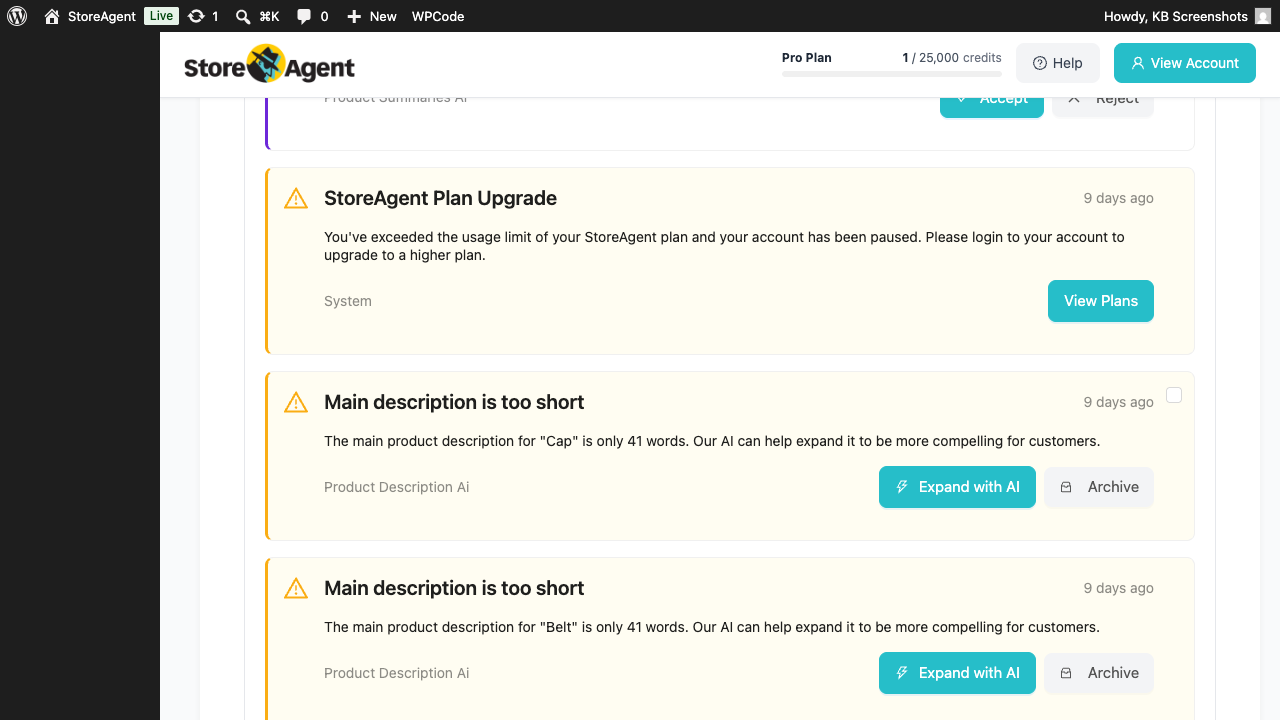
| Yellow ⚠ | Warning / System | Account, billing, or system messages from StoreAgent itself | View Plans, Open settings, or similar, usually a navigation link |
Every card also shows the source AI Task name in small text under the body (for example, Product Summaries Ai or Product Description Ai), plus a relative timestamp on the right (4 days ago). System notifications show System instead of an AI Task name.
Acting on a decision notification
Decision notifications are the most consequential. An AI Task has analysed your store and has a concrete suggestion ready, for example the Product Summaries AI spotting a product with no short description and offering to write one.
- Read the notification body. It tells you which product or item is affected and what the AI is proposing.
- Click Accept to apply the change immediately, or Reject to dismiss the suggestion. Accepted changes are written to the relevant product or content item right away, there’s no separate review step after Accept.
- The notification disappears from the active view and moves to the archived list. You can view it again by clicking Show Archived.
Acting on a suggestion notification
Suggestion notifications (the blue type) are typically about content quality, a thin product description, a category with no copy, a missing alt tag. The card includes an inline action that runs the relevant AI Task on the affected item.
- Read which product the AI flagged.
- Click Expand with AI (or the equivalent action for that AI Task) to run the suggestion. The AI generates the improved content and writes it back to the product.
- Or click Archive to dismiss without making changes.
Archived notifications
Click Show Archived in the panel header to view items you’ve actioned, dismissed, or bulk-archived. Archived cards look the same as active ones but their action buttons are disabled, they’re a read-only history.
To return to active items, click Show Active (the button label flips automatically while you’re in the archived view).
Which AI Tasks send notifications
These AI Tasks file notifications to the dashboard. Each one only sends notifications if you’ve enabled it in StoreAgent → Settings → AI Agents:
- Product Description AI: flags products with thin or missing descriptions and offers to expand them
- Product Summaries AI: flags products missing a short description and offers to generate one
- Product Tags Generator AI: suggests updated product tags
- Category Description AI: suggests updated category descriptions
- Review Moderation AI: flags incoming product reviews that look like spam, fake, or inappropriate, with an Accept/Reject prompt
Plus system notifications from StoreAgent itself: plan limits, billing, and feature announcements.
Troubleshooting the dashboard
The dashboard still shows the setup screen, or my metrics look empty
The dashboard shows the Welcome setup screen instead of your metrics when the selected time range has no chat sessions and no chat-attributed sales. If you expected to see data, check the following.
- Widen the time range at the top of the page (try All), in case your activity falls outside the current window.
- Confirm the AI Chat Bot is live on your storefront and has actually answered at least one customer. A chat is only counted once the bot replies in a session, so a widget that is not added, not connected, or not answering records nothing.
- If you have just set up or upgraded, allow a little time for chats and impressions to start building up.
Why does my conversion rate or revenue show a dash?
A dash means the figure cannot be shown reliably yet, not that something is broken. Conversion rate shows a dash until you have enough chat sessions to calculate it, which prevents misleading numbers. Revenue shows a dash until chat-attributed revenue is available.
How fresh is the data?
The dashboard is worked out when you load it, with a short cache of about a minute. There is no overnight processing to wait for, so refreshing the page shows current figures.
Related features
- How to set up the StoreAgent onboarding wizard: runs the same setup checklist as the dashboard hero, in one guided flow.
- Getting started with StoreAgent AI Tasks: turn on, configure, and run each AI Task that files notifications here.
- Getting started with the AI Chat Bot: set up the chat widget so chats start showing up in your KPI metrics.
Need help?
If you have a question or run into any issues, we’re here to help.
- Premium users: Open a support ticket
- Free users: Visit our community forum