Introduction
If you’ve ever spent an hour manually typing product tags, you know the pain. We’ve done it ourselves — more times than we’d like to admit. It’s tedious, it’s repetitive, and it’s very easy to mess up.
The Product Tags Generator AI Agent was built to fix that. It looks at your product descriptions and figures out what tags make sense — so you don’t have to.
Since we started using it, we’ve cut down tagging time from hours to minutes. And more importantly, our products are easier to find in search — both for customers and inside the admin.
In this guide, we’ll walk you through exactly how to use it. We’ll also show you how to tweak its settings, and share some of the things we’ve learned from using it ourselves.
What is Product Tags Generator AI?
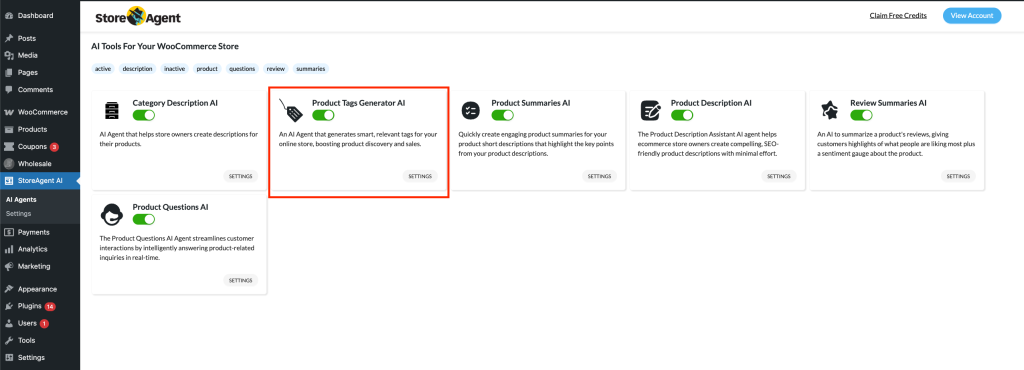
This AI tool lives right inside your WordPress dashboard. You’ll find it under StoreAgent AI → AI Agents.
Its job is simple: read your product descriptions and generate smart, relevant tags based on what it finds.
It’s kind of like giving your products a little SEO assistant that doesn’t take breaks.
We’ve used it on all kinds of stores — from jewelry to health products — and it adapts well.
If your descriptions are clear, it picks up on the key points and turns them into usable tags.
This saves time and helps your product catalog stay organized.
It also helps with filtering, searching, and recommendations — all the small things that make shopping easier for customers.
To activate this AI Agent:
- Navigate to StoreAgent AI → AI Agents in your WordPress dashboard.
- Find Product Tag Generator AI in the list.
- Click the red Inactive button until it turns green and says Active.

How It Works
Once the agent is turned on, it goes to work behind the scenes.
It reads your product descriptions and attributes like a careful librarian. Then, it suggests tags that make sense — things shoppers might search for or filters they might use.
We’ve found it especially helpful when importing products in bulk. Instead of writing tags one by one, the AI takes care of the heavy lifting.
Here’s what it looks at:
- Product title
- Product description
- Categories (if enabled)
- Attributes (like size, color, material — if enabled)
Based on that, it creates a list of keyword-style tags. These tags help with search and make browsing easier for customers.
Settings Overview

You’ll find the settings by clicking the Settings tab under the Product Tags Generator AI screen.
There aren’t too many knobs and dials here, but each one makes a difference. Here’s a quick look:
- Maximum number of tags to generate
This sets the limit for how many tags the AI should create per product. We usually leave it at 10 — enough to cover all the main ideas without going overboard. - Include product categories
When this is turned on, the AI pays attention to product categories while suggesting tags. It’s like giving it a little more context — we’ve seen better tag suggestions when this is enabled. - Include product attributes
If you’re using attributes like size, material, or color, keeping this enabled helps the AI create more specific tags. For example, instead of just “shirt,” it might suggest “cotton shirt” or “blue shirt.”
Once you’ve adjusted the settings, don’t forget to hit Save Changes.
Running the Agent
After setting things up, you’re ready to run the Product Tags Generator AI.
There are two ways to do it — one-by-one or in bulk.
For a single product:
- Head over to your product page in WooCommerce.
- Scroll to the Product Tags Generator AI section.
- Click Generate Tags.
- You’ll see the tags appear in a few seconds. From our experience, they’re pretty accurate — especially when the product description is detailed.
For multiple products:
- Go to Products in your admin menu.
- Select the products you want.
- Choose Run AI Agent from the Bulk Actions dropdown.
- Click Apply, then choose Product Tags Generator AI in the popup.
- Click Run Agent.
That’s it. You can keep working while it runs in the background. If you’re curious about the progress, just check the notification or logs.