WooCommerce product tags help shoppers filter your catalog and help search engines index pages that match real queries. They sit alongside categories and attributes, adding another layer of detail that shortens the path from search bar to checkout.
When used correctly, a good tagging system shapes a store that feels orderly rather than overwhelming. Have you ever noticed that the same products appear over and over when you test your store search? WooCommerce product tags can widen those results and introduce items that would otherwise stay buried.
In this article, we will talk about what tags are and how they differ from the categories you already use. We will also cover how to add them, the best practices for a clean strategy, and how to automate the process with a WooCommerce AI plugin when your store grows.
Table of Contents
What Are WooCommerce Product Tags?
WooCommerce product tags is a descriptive keyword or short phrase that describes a specific feature or attribute of an item. These supplemental labels provide more detail than a broad category can.
Think of them as providing specific details, like “organic cotton” or “holiday gift,” to help customers refine their search.
Unlike categories, tags are flat and optional, so you are free to add many per product or none at all. This gives you the flexibility to group related items that don’t fit into a neat hierarchical structure.
For example, you might have products in different categories—like “T-Shirts,” “Mugs,” and “Posters”—that all share a common theme, such as “Sci-Fi.” By adding a “Sci-Fi” tag to each of these items, you connect them in a way that categories alone cannot.
Product Tags vs. Product Categories

The main difference is that categories are hierarchical for broad grouping, while tags are non-hierarchical for describing specific details. Categories form the main aisle structure of a store, while tags act like specific signposts on the shelves.
Product categories are hierarchical, meaning you can have main categories with sub-categories nested inside (e.g., Apparel > Shirts > Long-Sleeve). Every product needs at least one category, as this is the primary way WooCommerce organizes your store’s main navigation.
Product tags, on the other hand, are “flat.” There is no parent-child relationship between them. This allows you to connect products across different categories that share a common attribute.
A “cotton” tag, for instance, could be applied to a t-shirt, a set of bedsheets, and a pair of socks, linking them all together for a shopper specifically looking for cotton products.
| Feature | Categories | Tags |
|---|---|---|
| Structure | Hierarchical (Parent/Child) | Non-hierarchical (Flat List) |
| Quantity per product | Usually one or two | Often five to ten |
| Example | Apparel > Shirts | cotton, v-neck, summer |
How To Add And Manage Product Tags In WooCommerce
WooCommerce gives you several ways to create and manage your WooCommerce product tags.
We will cover three main methods: creating tags from the main screen, adding them while editing a product, and using bulk actions for efficiency.
Let’s cover each method so you can choose the workflow that suits you best.
Method 1: Creating Tags from the Main ‘Tags’ Screen
This method is ideal for setting up a batch of new WooCommerce product tags before you start assigning them to products. It helps you build a consistent vocabulary from the start.
- Navigate to the Tags Screen
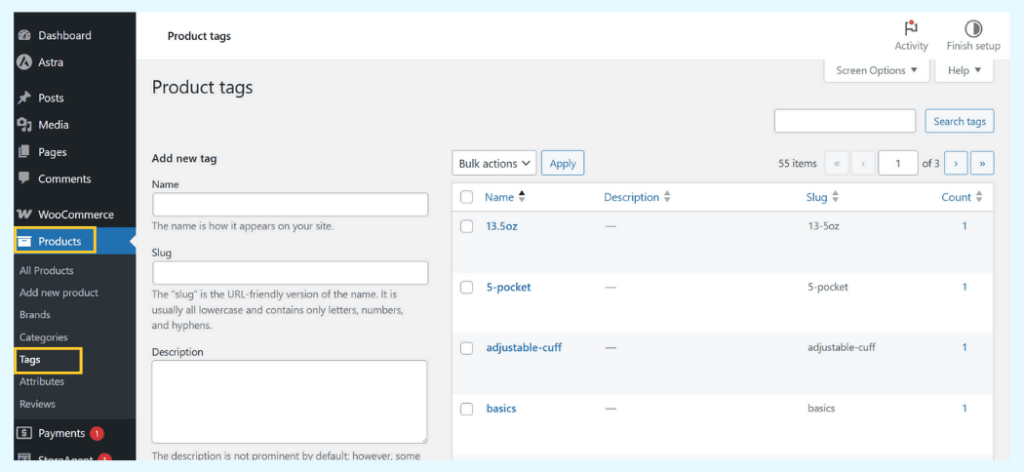
First, go to Products > Tags in your WordPress dashboard. This will take you to the central hub for all your WooCommerce product tags. - Fill Out the Tag Details
On the left side of the screen, you will see a simple form. Fill out the Name (how it appears to customers), the Slug (the URL-friendly version), and the optional Description for SEO purposes. - Add the New Tag
Finally, click the Add New Tag button. Your new tag will appear in the list on the right, ready to be used across your store.
Method 2: Assigning Tags from the Product Edit Page
This is the most common way to add tags as you create or update individual products. It’s a quick and intuitive part of the product setup workflow.
- Open a Product for Editing
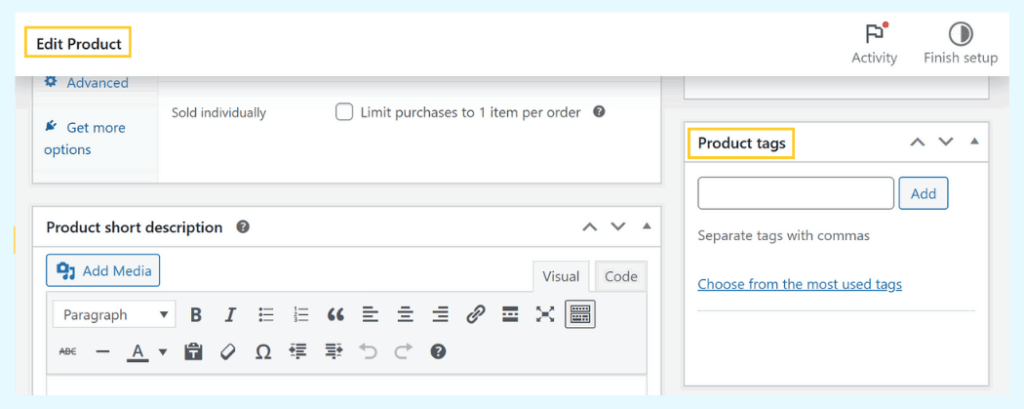
Go to Products > All Products and click to edit the item you wish to tag. - Find the ‘Product Tags’ Box
On the right side of the editor, locate the box labeled Product Tags. This is where you will manage the tags for this specific item. - Add Your Tags
Start typing the name of a tag. WooCommerce will suggest existing tags to help you maintain consistency. To create a new tag on the fly, just type the full name and press the Enter key.
Method 3: Using Quick Edit and Bulk Actions
These tools are essential for managing a large catalog efficiently and are designed to save you a significant amount of time.

- Use ‘Quick Edit’ for Single Products
From the Products > All Products list, hover over an item and click Quick Edit. A panel will open where you can quickly add or remove tags without loading the full editor. - Use ‘Bulk Actions’ for Multiple Products
To tag many products at once, use the checkboxes to select all the relevant items from your product list. Then, choose Edit from the Bulk Actions dropdown menu at the top of the page and click Apply. - Apply Tags in Bulk
A new panel will appear. Any tags you add in this panel’s “Product tags” field will be applied to all the products you selected. This is a huge time-saver for seasonal updates or managing new collections.

As you can see, the technical steps for adding tags are straightforward. However, simply knowing how to add them isn’t enough.
The next section will cover the strategy behind what WooCommerce product tags you should use to get the best results for your store.
Best Practices For An Effective Product Tagging Strategy
Creating e-commerce product tags is simple, but creating a good tagging system requires a bit of strategy.
Following these best practices for your WooCommerce product tags will lead to a better user experience and improved search performance.
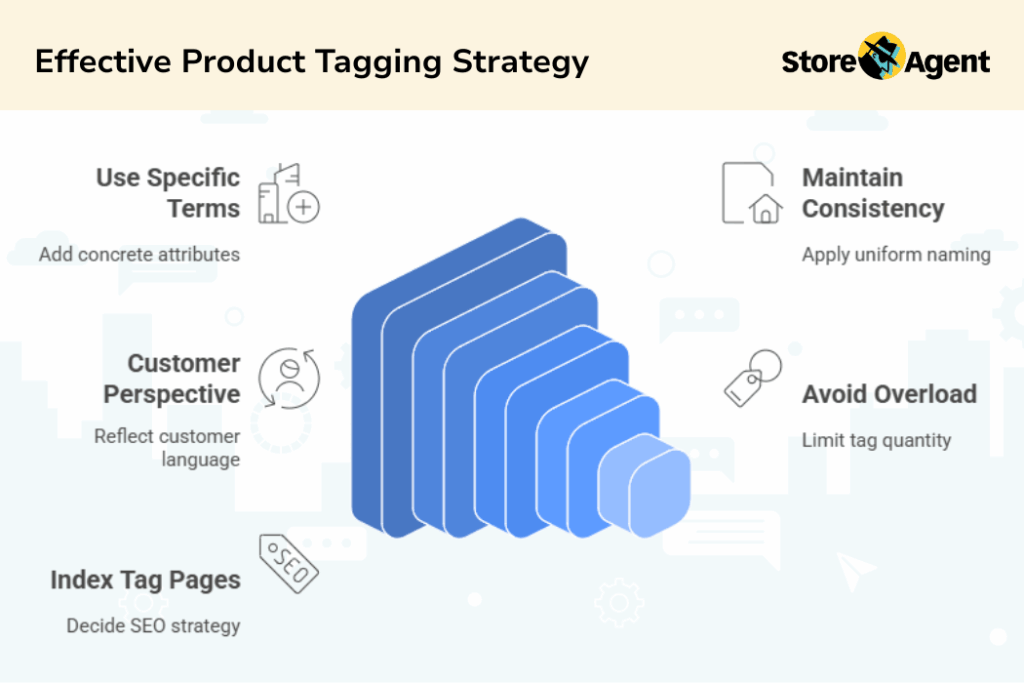
1. Use specific and relevant terms
A good tag should provide information not obvious from the category. Advise using tags that describe concrete attributes like material, style, or a special feature.
For a jacket already filed under Outerwear, tags like waterproof, packable, or vegan leather add genuine value and help customers narrow their search. Avoid redundant tags that just repeat the category name.
2. Keep your naming conventions consistent
This is one of the most important rules for a clean catalog. You must decide on a consistent format for your tags and stick to it.
For example, choose either singular or plural forms (e.g., shirt or shirts) and use that form across all products. Mixing them splits your filter results and weakens the relevance of your tag pages for both users and search engines.
3. Think from your customer’s perspective
Your tags should mirror the language your customers use. Put yourself in their shoes and ask, “What exact words would I type into a search bar to find this item?”
Using these terms as tags can surface your products not just in your store’s internal search, but also on external search engines like Google, capturing more qualified traffic.
4. Avoid tag overload
While it can be tempting to add every conceivable WooCommerce product tags to a product, more is not always better. Aim for a focused list of five to ten precise tags per item.
An excessive number of tags can clutter menus, create a confusing user experience, and even signal low-quality content to search engines. Quality and relevance are more important than quantity.
5. Decide whether to index your tag pages
Every tag you create automatically generates its own archive page. You have a choice to make regarding SEO: should these pages be indexed by Google?
For large stores with over 100 products, allowing these pages to be indexed can capture valuable long-tail keyword traffic.
However, for smaller stores, these tag pages can sometimes be seen as “thin content,” as they may only feature a handful of products. In these cases, it might be better to set them to “no-index” using an SEO plugin to avoid any negative impact.
The Challenge Of Manual Tagging
Manually following the guidelines above is perfectly practical when you have a small, manageable inventory.
But what happens when your store grows to hundreds or even thousands of products? The process quickly turns into a spreadsheet marathon.
Consistency becomes difficult to maintain, especially if multiple people are managing the catalog. New staff might invent near-duplicate tags (“v-neck” vs. “v neck”), and bulk edits can consume hours of your time.
This operational bottleneck is a common growing pain for successful e-commerce businesses.
A Faster Method: Using StoreAgent’s Product Tag Generator AI
With a tool like StoreAgent, the process is straightforward.
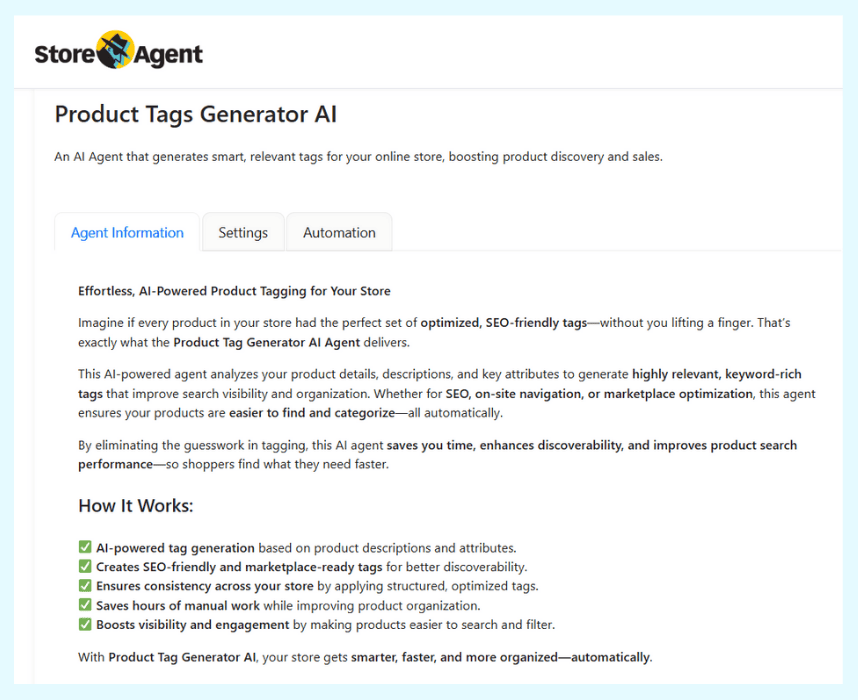
The StoreAgent Product Tag Generator is an AI tool integrated directly into your WordPress dashboard. Its purpose is to read your product’s title and description, then automatically suggest relevant and consistent tags.
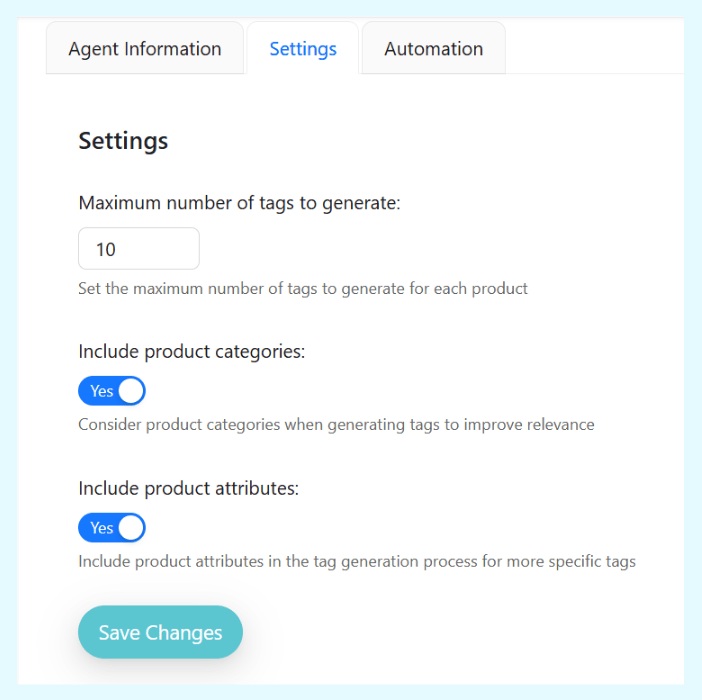
First, you activate the Product Tag Generator by navigating to StoreAgent > Settings > AI Content Tools in your WordPress dashboard. From there, you can click Settings under Product Tags Generator AI to adjust its behavior.
Once it’s active, the process becomes incredibly simple. As the image below demonstrates, a Generate with AI button appears in the “Product tags” box on your product edit page.
A single click prompts the AI to read your product information and instantly populate the field with suggested tags.

In this example, the AI has generated WooCommerce product tags like “high-waisted,” “minimalist,” and “wide-leg” based on the product description. You can then remove any you don’t need or click the button again to get more suggestions, giving you full control over the final result.
For a complete walkthrough of every setting and feature, read our comprehensive guide on the AI Product Tag Generator.

Conclusion
So, what’s the big takeaway? At the end of the day, using WooCommerce product tags effectively is all about making life easier for your customers. A smart, consistent strategy helps them find exactly what they’re looking for, which is a win for everyone.
Whether you stick with the manual method or decide to automate things as you grow, the goal is the same: create a store that feels organized and intuitive to shop.
We’ve covered a good bit of ground today. Here’s a quick recap of the main topics:
- What Are WooCommerce Product Tags?
- How to Add and Manage Tags in WooCommerce
- Best Practices for an Effective Tagging Strategy
- The Challenge of Manual Tagging in a Growing Store
- Using StoreAgent Product Tag Generator AI
Each of these pieces helps you build a more functional and discoverable product catalog. But let’s be honest—if your store is growing, spending hours on manual tagging is probably not the best use of your time.
If you need to save time while keeping your tagging system perfectly consistent, the StoreAgent Product Tag Generator AI was built specifically for that job.
If you’re ready to see for yourself how quickly you can get your catalog organized, explore our plans and see which one fits your store best.
Frequently Asked Questions
What is the difference between product tags and product attributes?
Product attributes are for creating selectable product variations, like “Small,” “Medium,” and “Large.” Product tags are descriptive labels for grouping and filtering related products across your store, such as “eco-friendly” or “best-seller.” Attributes are required choices, while tags are for navigation.
In short, attributes are essential data that define a specific product version. Tags are flexible marketing keywords that connect different products by a common theme or feature.
How many product tags should I use for each item?
Aim for five to ten specific, relevant tags for each product. Using too many can clutter your store and confuse shoppers, while too few may limit your filtering options and SEO potential.
Focus on key product features or themes that help customers narrow their search. Over-tagging makes navigation harder and dilutes your tag quality.
Can I bulk edit product tags for multiple products?
Yes, you can bulk edit tags in WooCommerce. Go to Products > All Products, select items, pick “Edit” from Bulk Actions, and add tags in the panel. This saves time compared to editing each product individually.
Bulk editing is ideal for seasonal updates or when assigning campaign-specific tags across several products. It keeps your catalog consistent and saves you from repetitive work.
Can using an AI to generate tags hurt my SEO?
No, using AI to create product tags will not hurt your SEO. Search engines like Google evaluate the final quality and relevance of the tags on your page, not the method used to create them.
Poor SEO comes from bad practices like keyword stuffing or using irrelevant tags, regardless of whether a human or AI does it. As long as you ensure the AI-generated tags are relevant and well-structured, it is a safe and effective way to improve your store’s search visibility.
Will an AI tag generator create irrelevant or nonsensical tags?
A quality AI generator like StoreAgent Product Tag Generator should produce highly relevant tags, as it analyzes your product’s title and description for context. While no AI is perfect, and it might occasionally suggest a generic term if your product details are sparse, it will be accurate the vast majority of the time.
Always give the generated tags a quick final review before saving. This combination of AI speed and human oversight ensures a perfect result every time.
