StoreAgent just rolled out its first major update: a brand-new AI tool called the Category Description AI!
This AI tool helps WooCommerce store owners quickly write better descriptions for product categories. It’s easy to use and saves time. Moreover, if used well, it can even help boost traffic, potentially driving more sales.
In this guide, we’ll explore what the Category Description AI is. We’ll also give you an easy step-by-step guide to using it to generate ideal descriptions for your WooCommerce product categories.
So, ready to learn more? Then read on!
What Is The Category Description AI?
The Category Description AI is a helpful AI tool made for WooCommerce store owners. It creates clear and interesting descriptions for different product categories, making it easier for customers to understand what kinds of products are in each group.
The AI examines the products in a category, finds important keywords, and follows market trends to write better descriptions. This helps your store show up more in search engines, which means more people can find it. It also makes your website easier to explore and shop from, whether you’re starting a new store or improving an old one.
Here are the benefits of using this AI tool:
- Saves time by automatically writing category descriptions
- Keeps your brand voice consistent across all pages
- Boosts search engine rankings to make your store easier to find
- Enhances site navigation to make shopping easier and more enjoyable
- Makes store pages more appealing to customers
- Improves the shopping experience for all visitors
- Works well for both new stores and existing ones being updated
Thanks to all these benefits, this AI can help increase your store’s traffic and potentially boost your sales.
How To Use The Category Description AI (Step By Step)
In this step-by-step tutorial, we’ll teach you how to use StoreAgent’s Product Summaries AI.
Follow these simple steps to start:
Step 1: Activate the Category Description AI
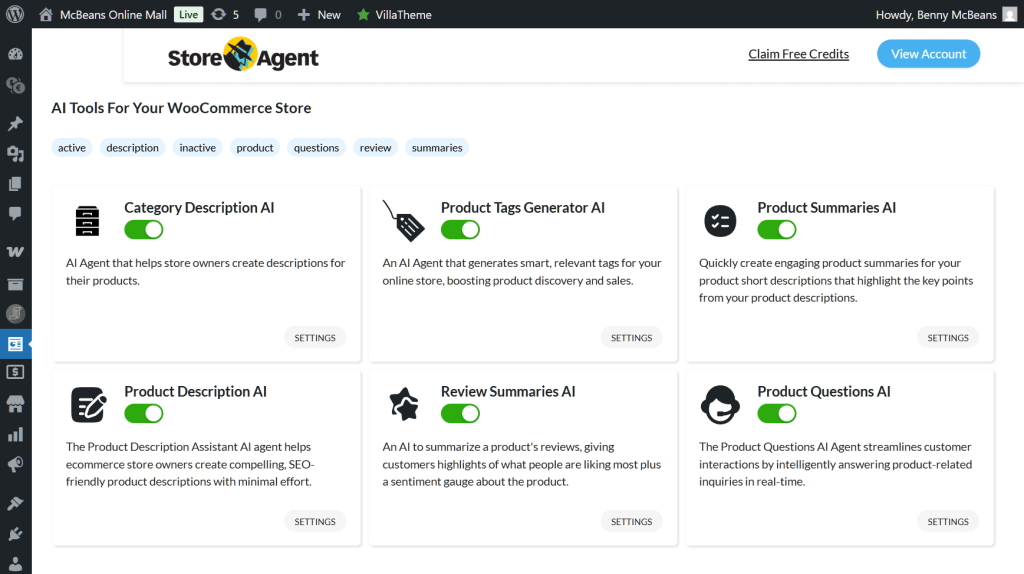
First, navigate to your WordPress admin dashboard. Then, click StoreAgent AI > AI Agents to access the StoreAgent page. Here, you can view all available AI tools:
Now, activate the Category Description AI by toggling its button. Once this button says “Active,” you can start using the agent immediately.
Step 2: Set up the AI to generate the category description
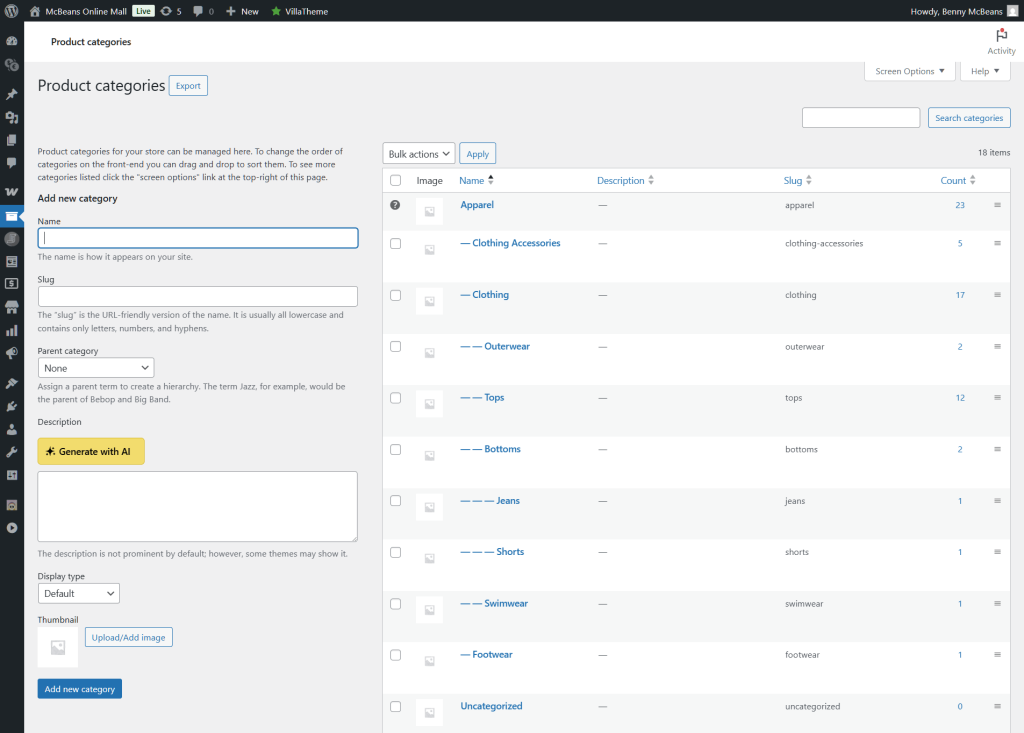
It’s time to pick a product category. Click Products > Categories to go to the Product categories screen. Here, you can create new categories or edit existing ones. You can use the Category Description AI when doing either.
For this tutorial, we’ll generate a description for an existing category. To start, hover your cursor over a category on the right, then click its Edit button.
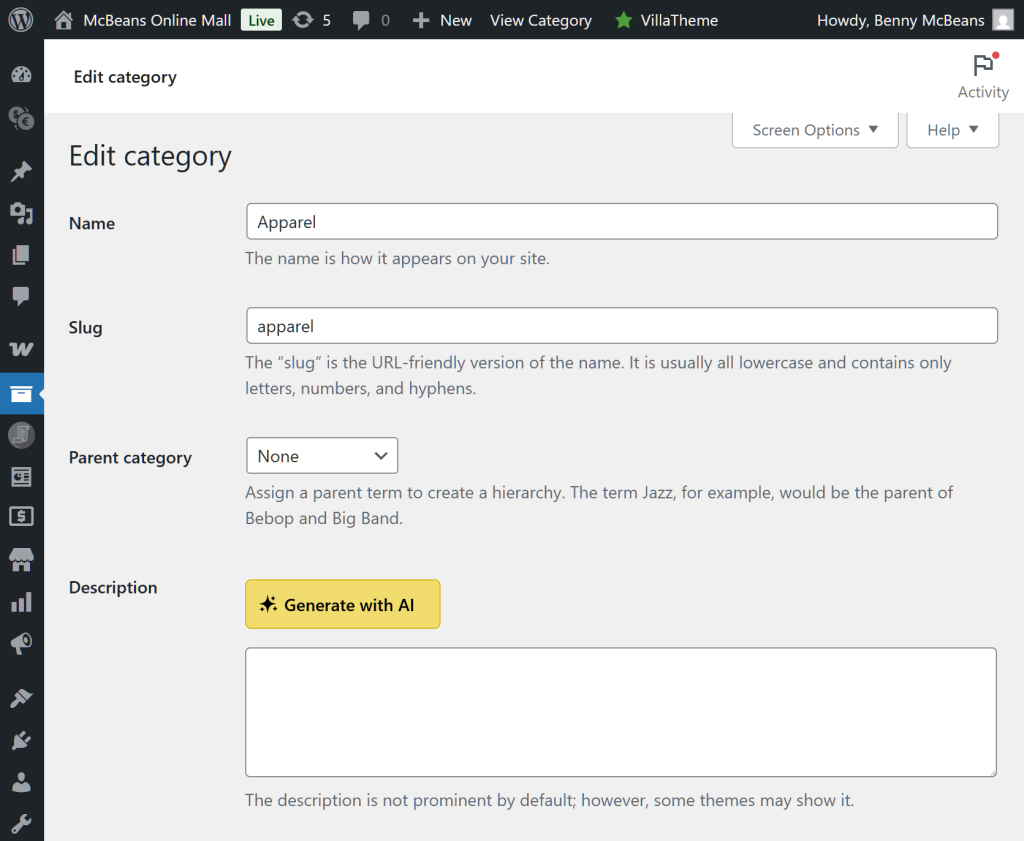
This takes you to the category’s Edit category screen.
For example, we chose to edit the “Apparel” category in the image below.
Next, scroll down to the Description box and click the Generate with AI button.
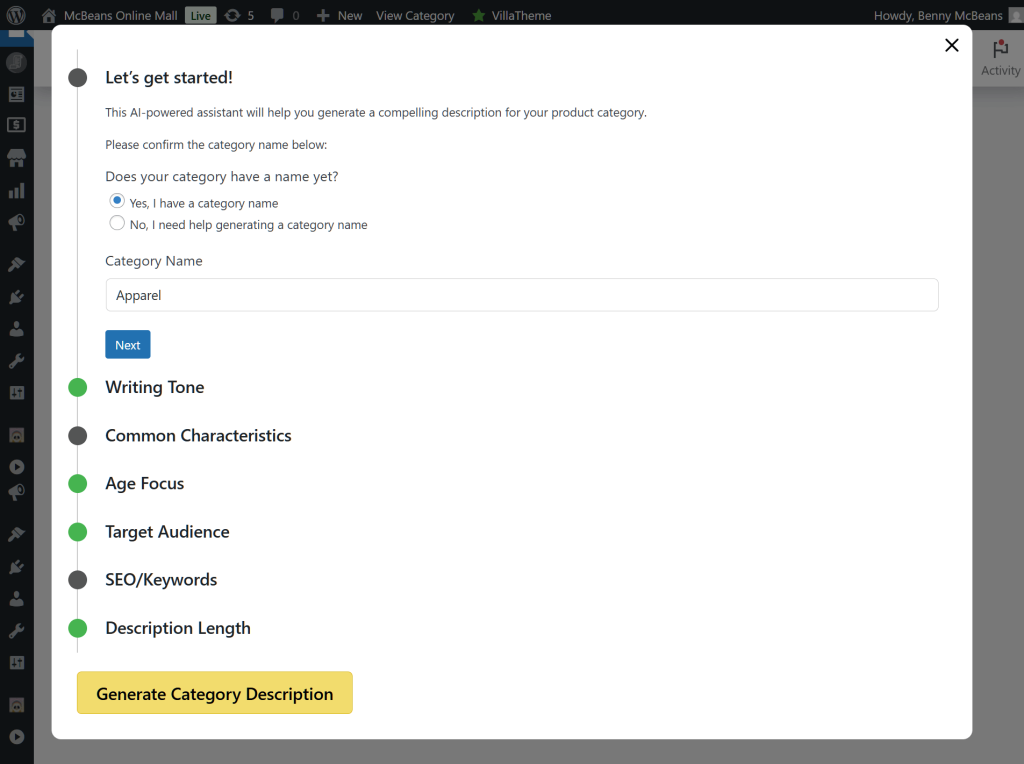
You can now configure various settings (which should look familiar if you’ve already used the Product Description AI). Let’s go over each one!
1. Let’s get started!
The first option lets the AI generate a category title for you if you don’t already have one. You can even change the current title if you wish.
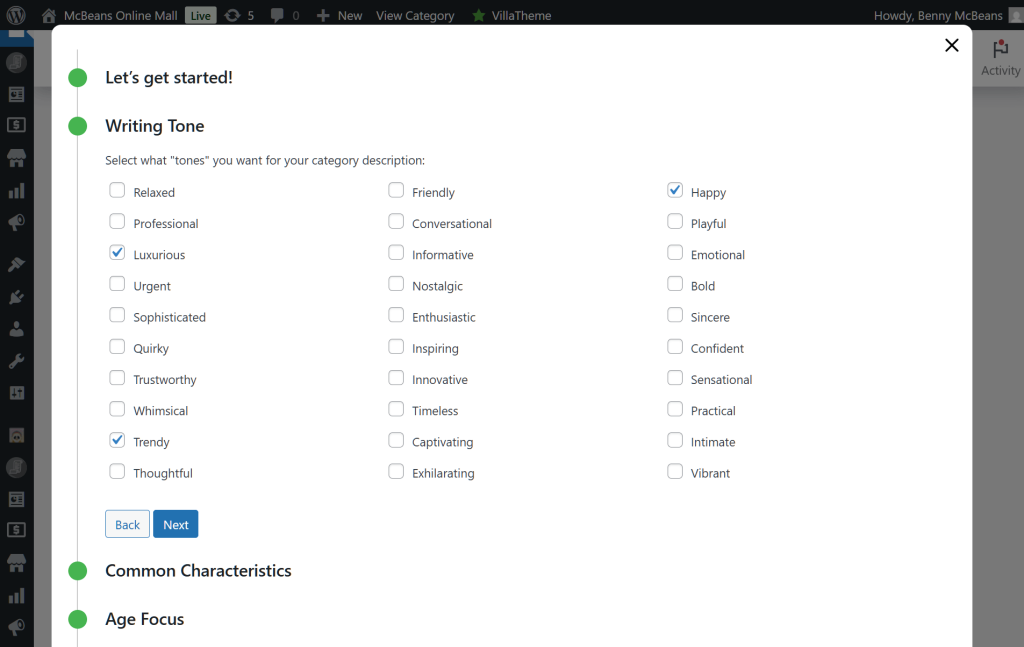
2. Writing Tone
How do you want the description to sound? Do you want it relaxed? Then tick the “Relaxed” checkbox. Do you prefer nostalgic or urgent? Just tick the appropriate box!
Furthermore, you can select more than one tone. For example, in the image below, we ticked the checkboxes to make our “Apparel” category description sound trendy, luxurious, and happy.
As you can imagine, this helps the AI generate a description that aligns with your brand’s unique voice.
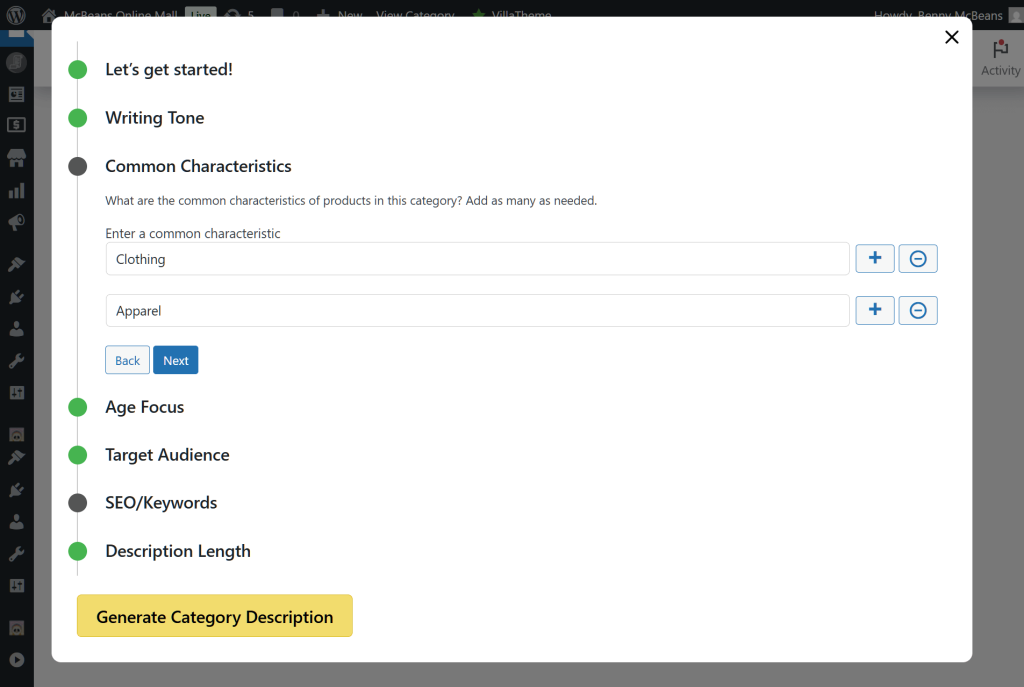
3. Common Characteristics
What unique qualities define the product category? With this option, you can highlight the characteristics that set the category apart.
Click the + button to add characteristics and the – button to remove them. Add as many as you need.
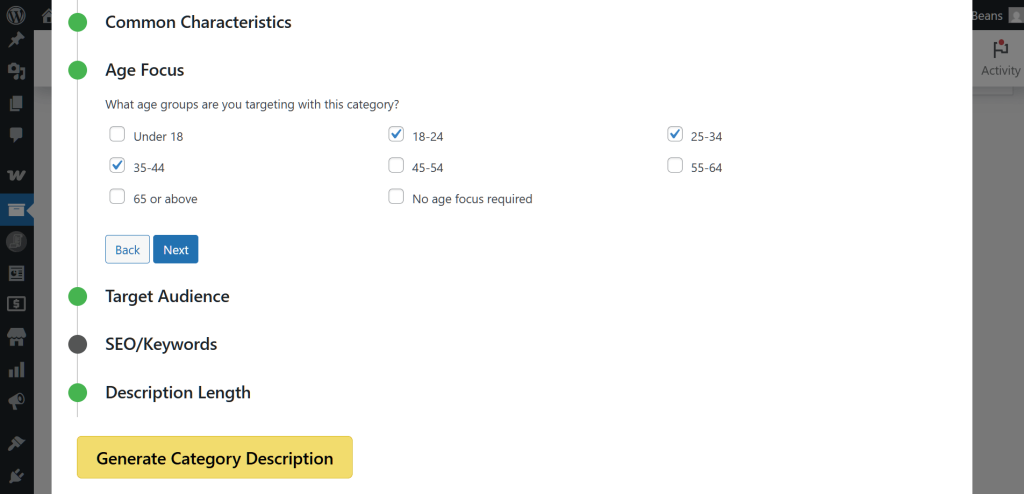
4. Age Focus
Use this option to select the age range the category’s products are intended for. For example, if your clothes are for teens and kids, tick the “Under 18” checkbox. Selling to people in their late 30s or early 40s? Tick “35-44.”
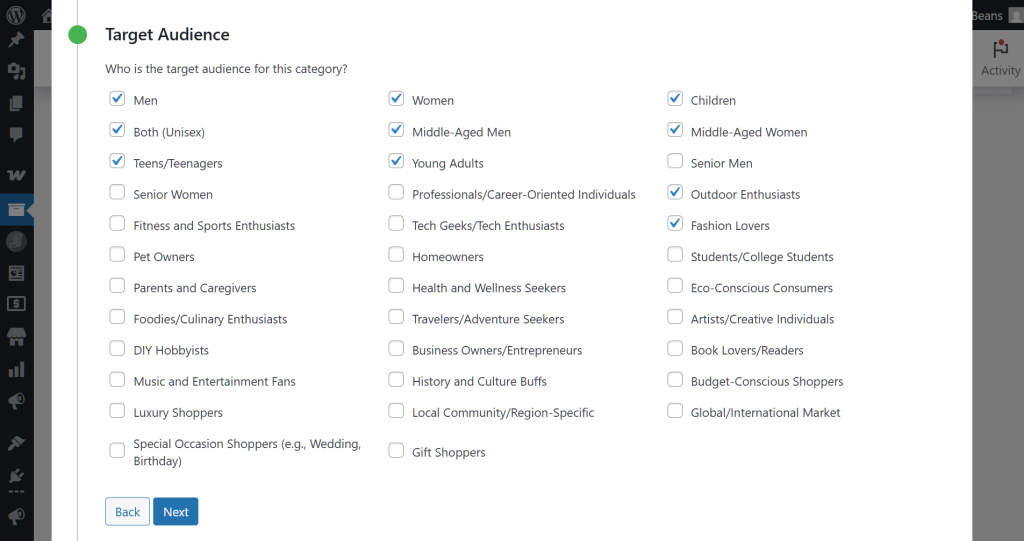
5. Target Audience
Each product category is aimed at a specific audience. This AI lets you set that audience so it can write a fitting description.
Our “Apparel” category targets men and women aged 18 to 44, so we ticked the corresponding checkboxes to match.
Tick as many checkboxes as you see fit!
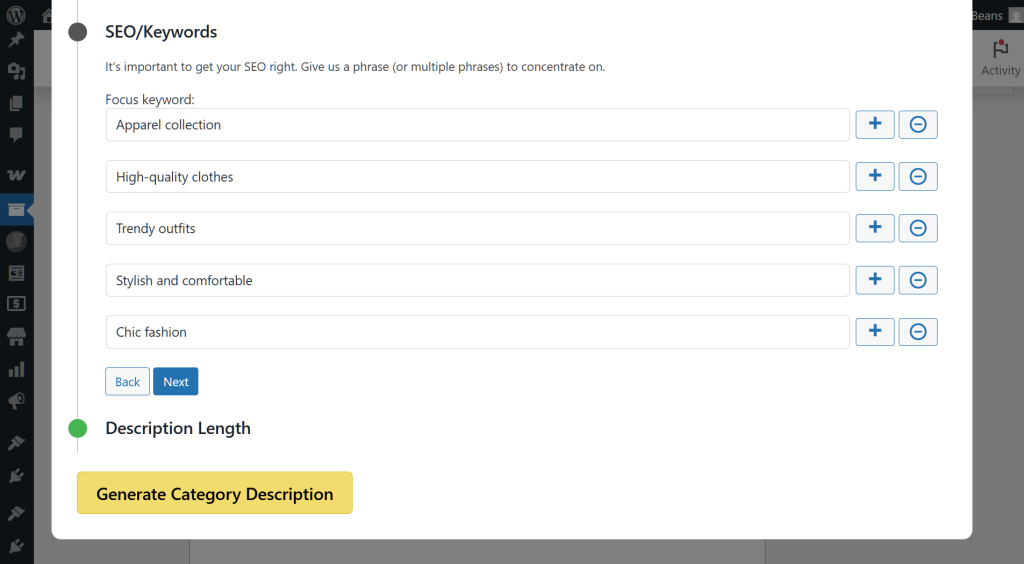
6. SEO/Keywords
SEO plays a crucial role in ensuring your category descriptions reach the right audience. This option allows you to add SEO keywords for the AI to incorporate into every description.
For example, in the image below, we’ve added keywords that customers might use to search for products in our “Apparel” category.
Click the + button to add keywords and the – button to remove them. Include as many as required!
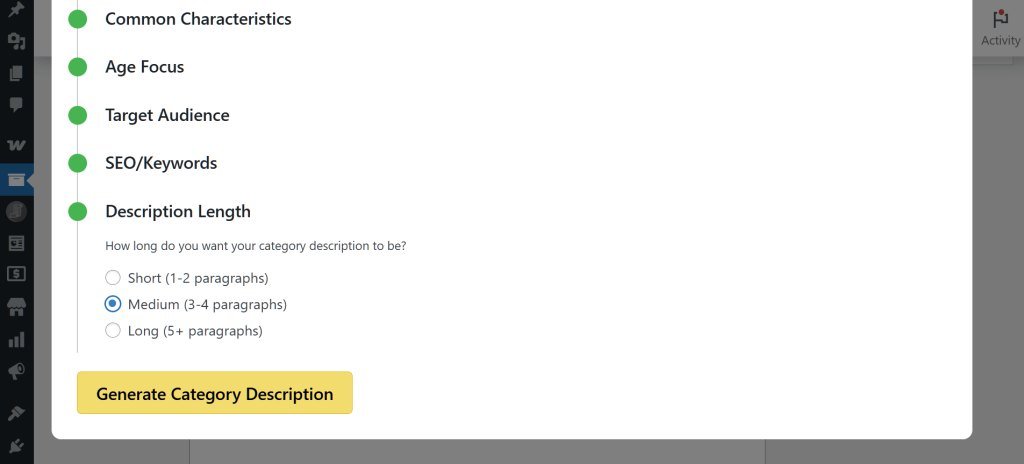
7. Category Description Length
Lastly, you can choose how long the description should be. As illustrated below, you have three choices:
Step 3: Generate the category description
After completing the steps above, click the Generate Category Description button. Basically, this instructs the AI to create your product description within seconds.
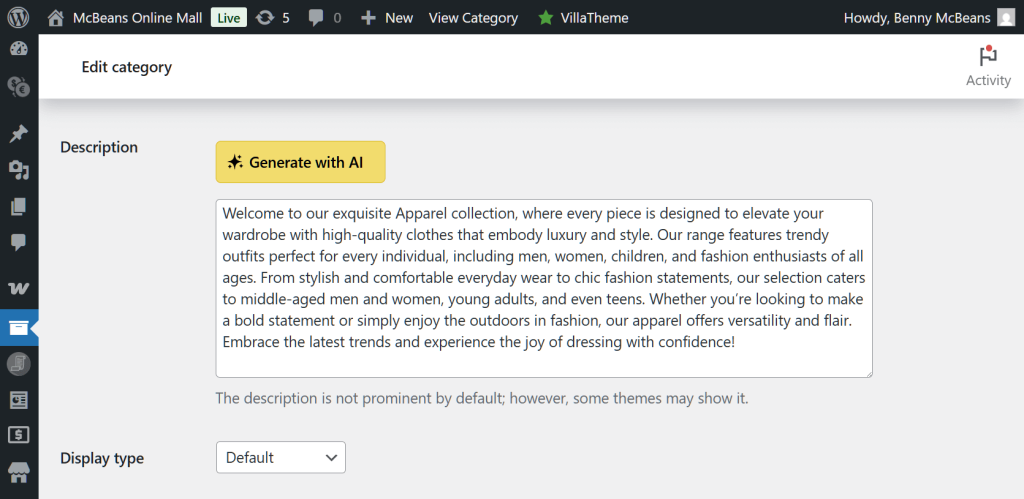
Below is the result generated by the AI for our “Apparel” category.
If you’re not satisfied with the description, you can click the Generate with AI button at any time to create a new one. Alternatively, you can edit the text yourself.
Once you’re done, scroll down to the Update button to save your progress.
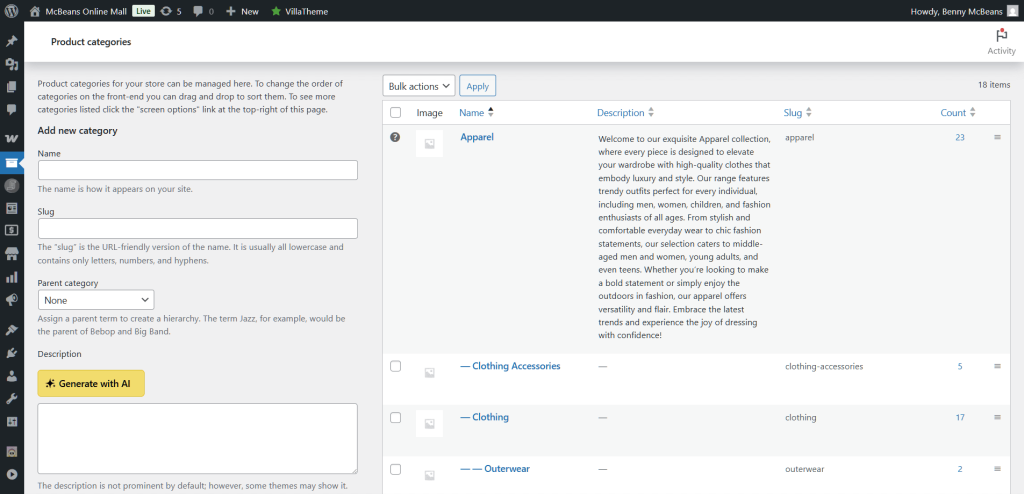
And that’s it! As you can see on the right side of the screen, the “Apparel” category now has a description.
You can use the AI to generate descriptions for all main categories and subcategories!
Related Read:
Settings and Agent Information
Before using the Categories Description AI, it’s a good idea to learn more about how it works or adjust its settings.
To do either, go to your WordPress admin dashboard and click StoreAgent AI > AI Agents. This brings you to the StoreAgent page.
Now, click the Categories Description AI’s Settings button.
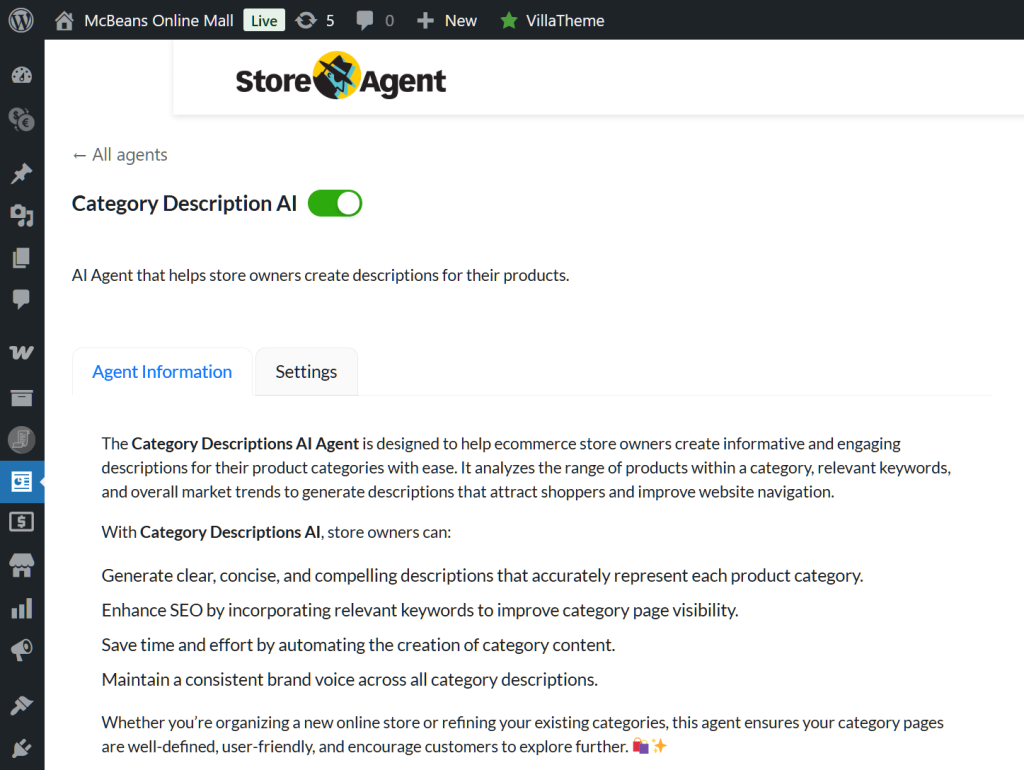
For more details about the AI, click the Agent Information tab. This provides you with key details about what the AI does and how it can help store owners.
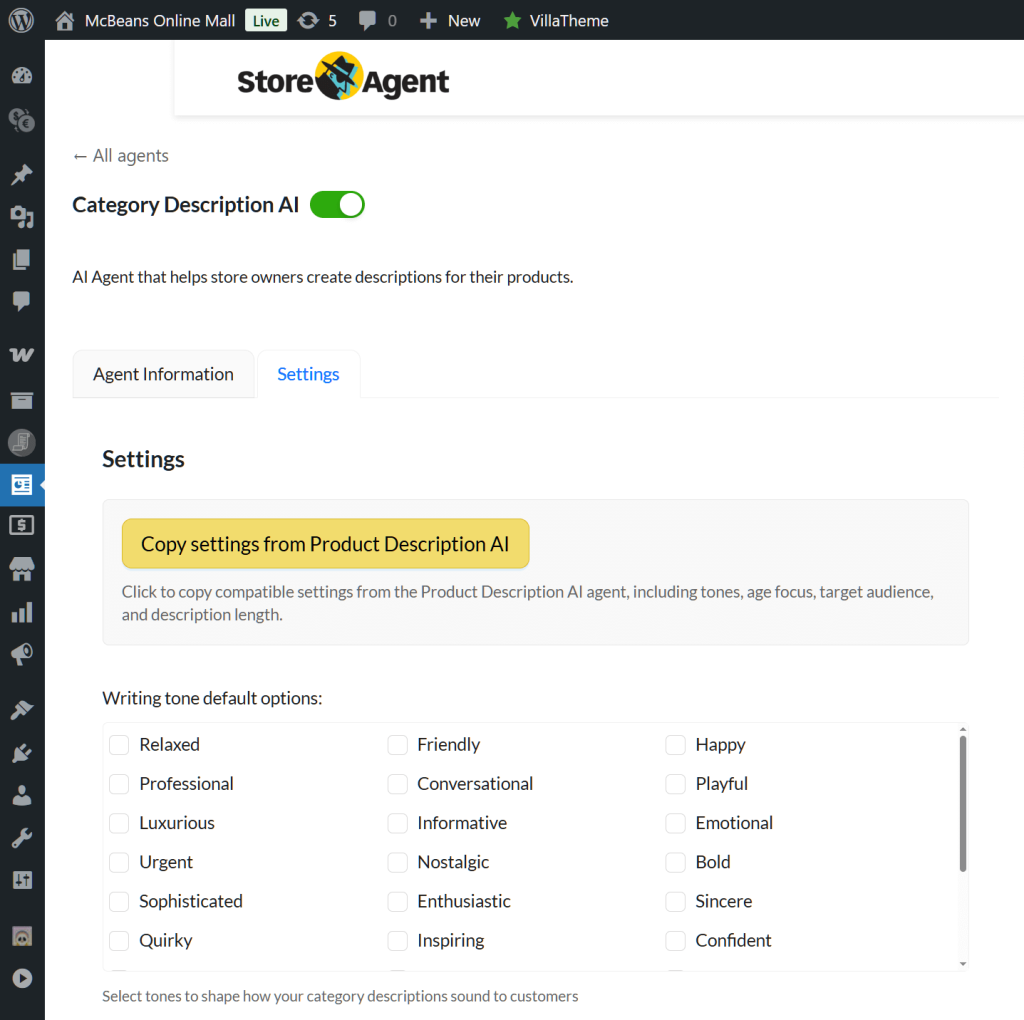
To configure the AI’s settings, click its Settings tab. This lets you determine its behavior before using it.
The settings allow you to configure many of the options from Step 2, including the writing tone, age focus, target audience, and the length of the AI-generated category description. The difference is that ticking the checkboxes in the Settings tab makes these options the defaults when you reach Step 2.
For example, if you tick the “Relaxed” checkbox, this writing tone will be selected by default each time you use the Category Description AI. Likewise, selecting “18–24” sets that age range as the default age focus.
Excited to learn more about Product Category Description AI? Then check out the following guide:
What Is A Product Category Description AI (And Why Is It Helpful In WooCommerce)?
And if you’d like some tips on using this AI tool to boost your marketing strategy, read the following:
What Is Product Category Marketing + Why Is It Helpful For WooCommerce Stores?
Conclusion
Writing good category descriptions doesn’t have to take hours. With the Category Description AI, you can create clear, helpful descriptions in seconds.
To summarize, this guide explore the following core concepts:
Try out this new AI tool to make your store easier to find and shop from! And if you have questions about the Category Description AI or StoreAgent, just let us know—we’re happy to help!
